.png)

Creative Retouching: Techniques, Inspirations & Best Practices
Defining Creative Retouching
Creative vs Standard Retouching
Standard retouching is about cleaning up. You fix blemishes, remove dust, balance exposure, and keep the image true to reality. Creative retouching, on the other hand, goes beyond correction. It transforms.
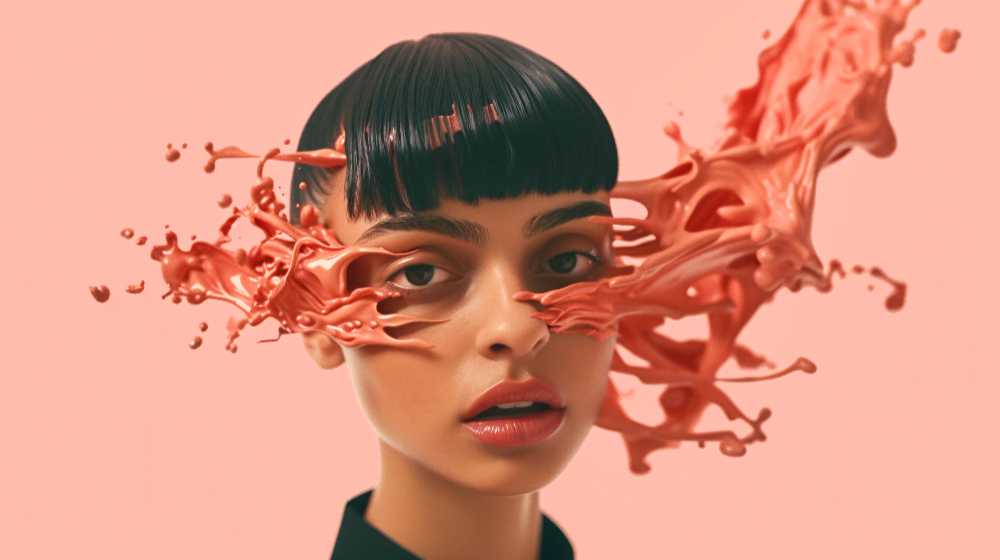
Think color shifts that set the mood, surreal composites that bend logic, or overlays that add texture and symbolism. It is where imagination takes over and rules get rewritten.
The boundary is subjective. When the goal shifts from realism to storytelling, you are in creative territory.
Historical Context and Evolution
Creative retouching is not new. It started in the darkroom, long before Photoshop existed. Photographers used burning, dodging, masking, and even physical layering to manipulate film prints. The tools were analog, but the intent was the same — shape the image into something more expressive than what the camera captured.
With digital tools, creative retouching exploded. Advertising, editorial, and fashion embraced it early. Campaigns needed images that stood out, told a story, and created emotion at a glance. What was once experimental became a core part of commercial image making.
Now it is everywhere. From surreal product ads to fine art photography, creative retouching shapes how we see and feel images.
Roles and Use Cases
Creative retouching shows up in more places than people expect.
In fashion and editorial, it adds drama, enhances textures, and creates visual fantasy. You can stretch reality while still showcasing clothing or beauty.
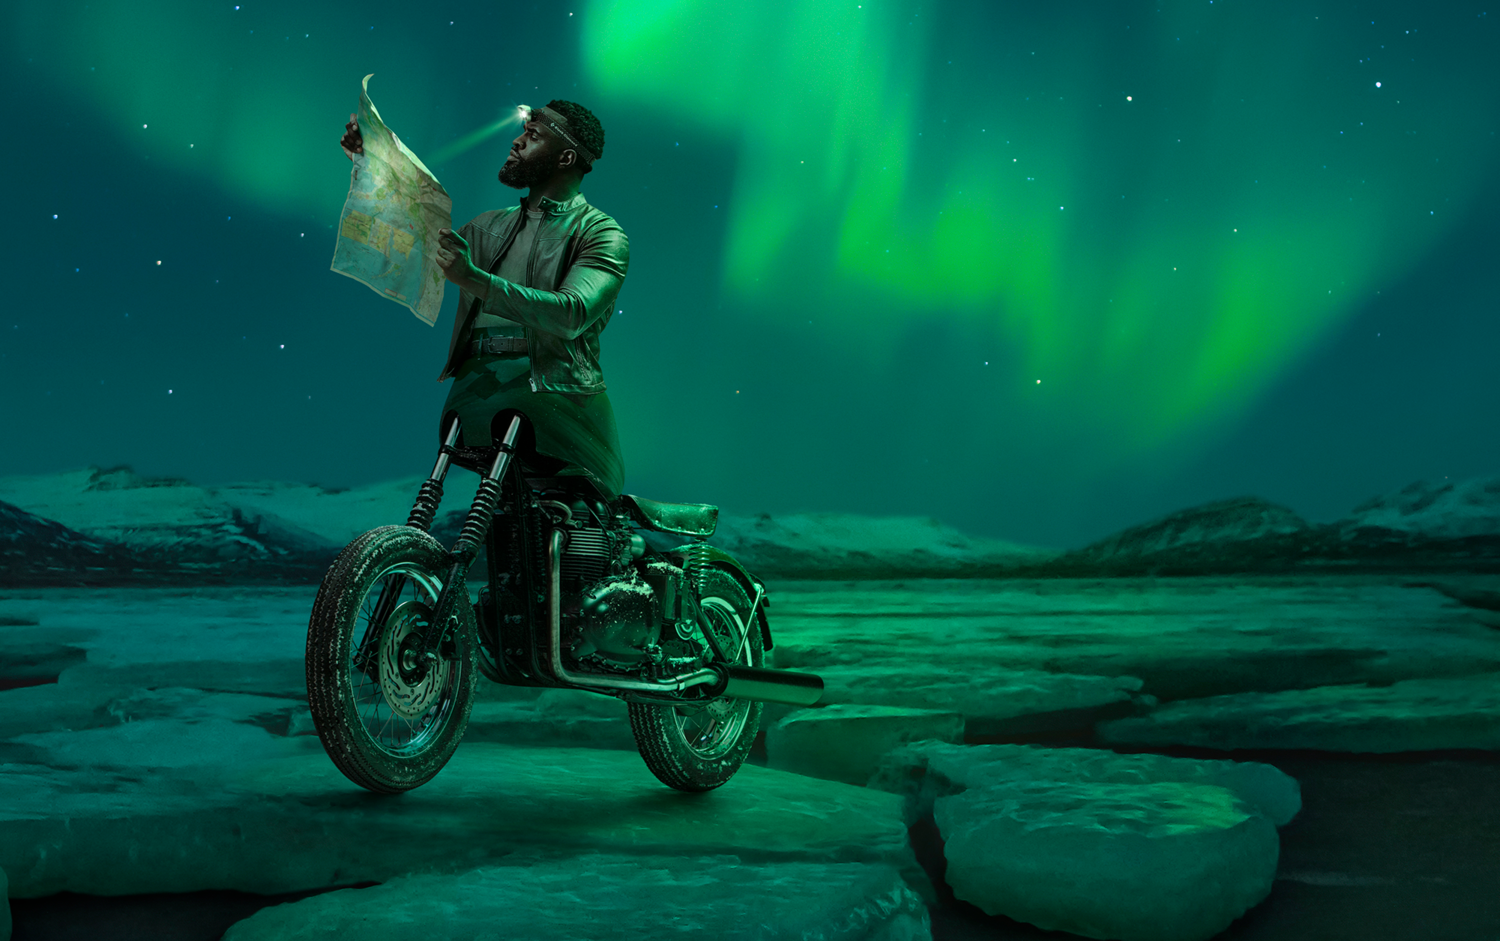
In advertising, it builds worlds. Think floating products, manipulated scenes, glowing highlights. Every visual is intentional and designed to trigger emotion or desire.
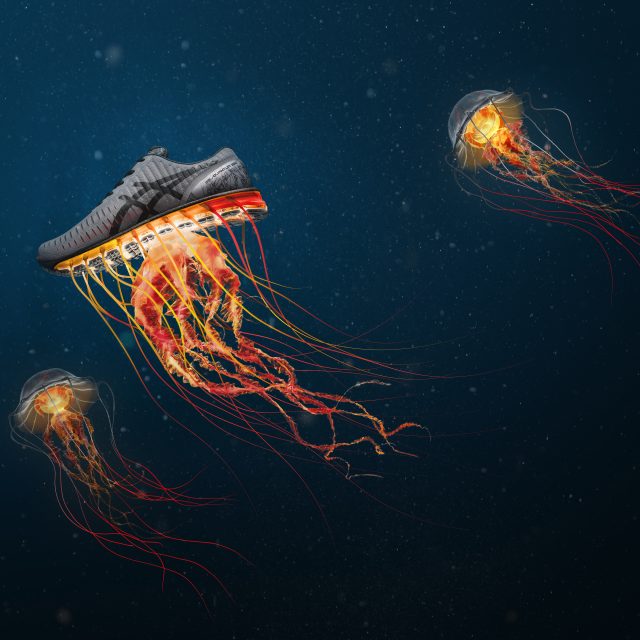
In product and conceptual photography, it elevates simple shots into branded art. A bottle can look ordinary on a table, or luminous and sculptural with the right effects.
In personal and fine art projects, it becomes deeply expressive. Artists use it to explore identity, memory, and surreal visuals that exist outside real-world logic.
Core Principles and Aesthetic Foundations
Composition and Visual Flow
Creative retouching does not work in isolation. It lives inside the frame. How your eye moves across the image still matters, maybe even more than before.
Use leading lines, balanced framing, and clear focal points to guide attention. Retouching can help by emphasizing certain elements, removing clutter, or enhancing depth. But it can also break the flow if overdone. That glow effect might look cool, but if it pulls the eye away from the subject, it weakens the image.
Know when to add and when to subtract.
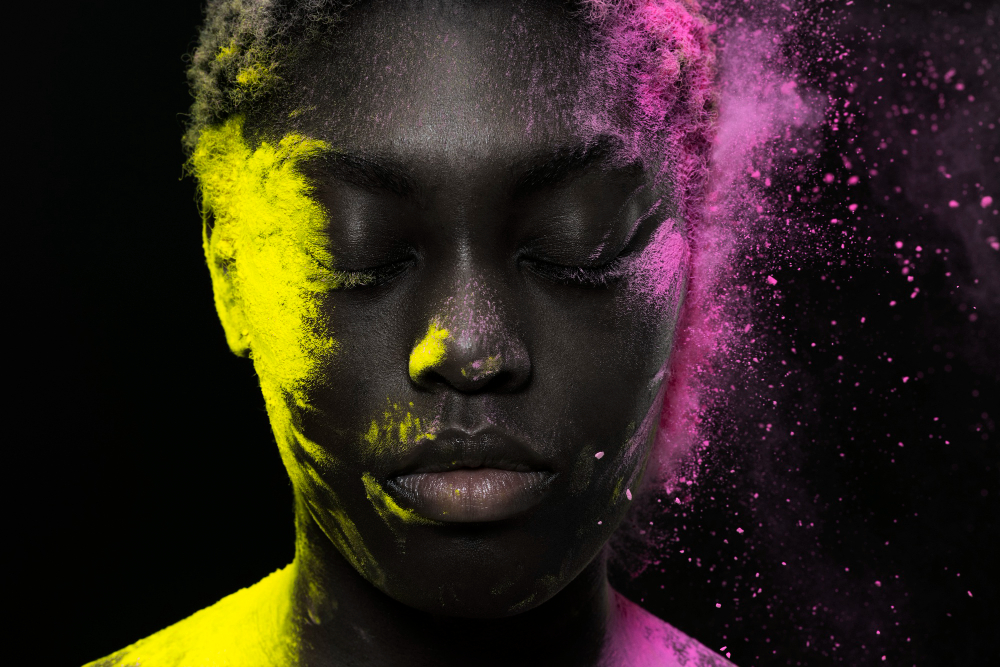
Color Theory and Mood
Color is emotional. It sets tone before viewers even realize what they are looking at.
Through creative retouching, you can push colors to harmonize or contrast, depending on the vibe you want. Warm tones feel inviting. Cool tones feel distant. High contrast can feel bold. Desaturated palettes can feel dreamy or eerie.
Tools like gradient maps or LUTs help you grade your image like a film. Just make sure the colors support the mood and message you are after.
Light, Shadow and Depth
Light can shape emotion just as much as color. In creative retouching, you are not stuck with what was captured in camera. You can enhance shadows, push highlights, or even paint light into places where it never existed.
Dodge and burn techniques help sculpt the subject. They add dimension to flat images. A face can feel more three dimensional, a product more sculptural, simply by shifting the light and dark balance.
Depth makes images immersive. Without it, they fall flat — no matter how clean the edit is.
Texture and Surface
This is where many retouchers go too far.
Smoothing can work, but overdoing it removes life from the image. Texture matters — in skin, fabric, surfaces, and even backgrounds. It is what keeps a photo feeling tangible.
Use tools like contrast, clarity, and noise intentionally. A little grain can unify layers. A slight texture overlay can add grit or mood. Just make sure your surface details support the style, not fight it.
Concept and Narrative
Every creative retouch should have a reason behind it. A story. A concept.
Maybe it is surreal, maybe symbolic, maybe just a feeling — but it should not be random. Floating a model in the sky or fragmenting a face looks impressive, but without meaning, it becomes visual noise.
Start with the idea. Then use effects, layers, and enhancements to build the narrative. When the concept leads the technique, your image hits harder.
Techniques and Tools in Creative Retouching
Layering and Compositing
At the heart of creative retouching is the ability to blend multiple elements into one seamless image. That means working with layers. Lots of them.
Use layer masks to reveal or hide parts of each element. Combine images taken at different times or places. Pull skies from one frame and shadows from another. Add textures, graphics, or entirely new subjects.
Compositing is where you start turning a photo into something more — a constructed visual that still feels believable.
Transformations and Distortions
Sometimes you need to push the shape of reality. That is where transformations come in.
Warping, liquifying, stretching, and rotating can all shift the way an object feels. Want to elongate a dress, bend a shadow, or curve the horizon? These tools give you that control.
Used carefully, distortions can guide the eye, suggest movement, or build tension. Used recklessly, they can break your image. Know the difference.

Special Effects
Creative retouching is not just about what you add — it is about how you add it.
Introduce glows, sparkles, fog, or lens flares. Use light leaks to add mood or nostalgia. Try double exposures for dreamy layers. Throw in symmetry, reflections, or overlays to create rhythm or abstract beauty.
These effects should not be decoration. They should support the image's purpose. When done well, they feel invisible — like they always belonged there.
Color Manipulation
Color is not just for correction. It is a design tool.
Use selective color shifts to make certain areas pop. Try gradient maps to stylize shadows and highlights. Blend modes let you stack colors, textures, and tones in surprising ways.
Split toning can balance warmth and coolness. Curves can pull out subtle shifts. And when all else fails, tweak opacity until it feels just right.
Color does not have to be accurate. It just has to be intentional.
Local Enhancements
Global changes are easy. But the best retouching often happens in the small, local adjustments.
Use dodge and burn to draw focus. Sharpen specific textures. Soften distracting edges. Add clarity in one area while reducing contrast in another.
These changes do not scream for attention. They guide it quietly.
Non Destructive Workflow
The more complex your edits, the more important it is to work non destructively.
Use adjustment layers instead of direct edits. Convert layers to smart objects before scaling or transforming. Build your effects in groups. Save versions with layer comps.
This way, you can always go back. Always make changes. Always undo without losing quality.
Automation and AI Tools
Creative retouching still needs a human eye, but tools are evolving.
Plugins like Retouch4Me handle skin smoothing, eye enhancement, and background cleanup faster than manual tools. AI tools can suggest color grades or remove objects instantly.
Use them to speed up the boring parts. But do not hand over the art direction. Creative choices still belong to you.
Workflow and Process
Pre Production and Concept Stage
Before you open Photoshop, have a plan.
Start with moodboards. Pull references that show the vibe you are after. It could be color palettes, lighting styles, compositions, or emotional cues. Sketch ideas if you need to. Even rough thumbnails can help you visualize how the final piece should feel.
This is also when you define your concept. What story are you telling? What visual metaphors or elements support that story? Locking this down early makes every edit more intentional later.
Raw Import and Initial Corrections
Once your images are in, do the technical cleanup first. Adjust exposure, white balance, and lens corrections. Straighten horizons, crop if needed. Remove sensor dust and obvious distractions.
This is not the time to get creative. Just prep your canvas. Make sure the base image is clean and balanced before you start adding layers or effects.
Blocking and Rough Retouch
Lay down the structure. Clone out unwanted objects. Mask in elements from other images. Build your initial composite if you are doing one.
Do not get lost in fine details yet. This stage is about rough layout. You want to make sure the scene works as a whole before you commit to polishing.
Think of it like scaffolding. Once it holds together, you can start decorating.
Creative Development
Now the fun begins.
Add your effects, overlays, light adjustments, and conceptual flourishes. Experiment. Try out versions. Push colors. Stretch shapes. See what happens when you go a little too far.
This stage is messy, and that is okay. The point is to explore. Just keep saving your work in steps so you can roll back if something goes sideways.
Final Polishing
Once your creative direction is locked, start refining.
Clean up edges. Smooth transitions between layers. Check skin tones, shadows, and reflections. Apply global adjustments to unify contrast, color, and sharpness.
Export in the right color profile. Save for web or print depending on your use case. Your final image should feel seamless — like everything in it was always meant to be together.
Review and Feedback Loop
If this is for a client or team, share your work early. Get feedback before locking things in. Use versions to show progress or offer options.
Even if it is just for yourself, step away and revisit it later. A fresh set of eyes, even your own, helps catch things you missed in the moment.
A solid review process turns good edits into great ones.
Notable Creative Retouchers and Studios
Some artists are not just retouchers — they are visual architects. Studios like Creative Retouching have built reputations on pushing visual boundaries while staying commercially sharp. Their work blends fantasy and polish, making surreal edits feel effortless.
Dig into portfolios like DigiSurgeon or individual artists on Behance and Instagram. You will find everything from ethereal portraits to product shots turned into full-blown narratives. What separates the best is not just technical skill. It is restraint, vision, and clarity of concept.
Studios pushing creative retouching
- Recom Farmhouse — world-class CGI + creative retouching; recent fashion/beauty and still-life project grids, including AI-augmented editorial work.

Taylor James — deep “Work” archive blending live-action, CG and retouch; see their Bose production/retouching breakdown.
- Saddington Baynes — notable for using neuroscience to refine imagery; Honda virtual showroom case write-up.
- The Retouchers (London) — film/TV key art, complex compositing, grading and stills post; portfolio and company background
Individual artists (strong narrative + restraint)
- DigiSurgeon (Tom Hanslien) — senior creative retoucher; portfolio spans product, fashion, architecture; active blog with process notes.
- Pratik Naik / Solstice Retouch — boutique high-end retouching; portfolio + ongoing education/content
- Instagram example: @retouch_annabel — beauty/fashion high-end skin work with clean, controlled grading
Illustrative Projects and Analyses
Before and after comparisons tell you a lot. Study breakdowns where you can see each stage — original image, composite layout, added effects, final grade. These progressions teach you how layers build up to create emotion and atmosphere.
Look for projects that explain the why behind each step. Why a certain light leak was added. Why the skin tone was shifted warmer. Why the background was blurred instead of replaced.
Seeing the thinking behind the tools gives you more than tutorials ever could.
Idea Prompts and Project Suggestions
If you are stuck or just starting out, try one of these:
- Take a basic portrait and add a surreal element like floating objects or mirrored reflections
- Reimagine a product shoot using dramatic lighting and bold color shifts
- Create a diptych that shows a “before” world and an “after” transformation
- Build a composite of elements from three unrelated images that share a mood
- Try visual metaphors — like a person cracking open, dissolving, or glowing from within
These ideas are not about perfection. They are about practicing your eye, sharpening your tools, and building your own creative language.
Challenges, Ethical Considerations and Best Practices
Over Editing and Loss of Authenticity
There is a fine line between creative and excessive. When every pore is smoothed, every highlight exaggerated, and every detail sharpened beyond reality, the image starts to feel fake.
Creative retouching should enhance the message, not distract from it. If the viewer is focused more on the effects than the subject, you have probably gone too far.
Ask yourself one question before publishing: does this still feel true to the original idea?
Managing Skin and Human Subjects
This is one of the most sensitive areas in retouching.
Skin should still look like skin. Maintain texture. Avoid plastic shine or unnatural tones. Be mindful of representation. Do not erase identity in pursuit of perfection.
Creative edits involving people should respect who they are. If you are making dramatic changes, involve the subject in that decision. Transparency builds trust, especially in editorial or branding work.
Copyright and Source Imagery
If you are blending stock assets, third party textures, or external elements into your images, licensing matters.
Make sure you have legal rights to use every part of the composite. This includes skies, buildings, animals, or even paint splatters. Just because it is online does not mean it is free.
Keep a record of where your sources come from. It protects you and keeps your workflow professional.
File Management and Performance
Creative retouching often means large, complex files with dozens of layers. Without a clear system, things spiral fast.
Use layer naming, folders, and color labels. Organize smart objects. Keep a backup of every major version. Optimize files for performance so you are not fighting slow load times or crashes.
This part is not glamorous, but it is what lets you actually finish the work.
Communicating with Clients
If you are doing creative retouching for a client, set expectations early. Show them a few style options before you go deep into the work. Explain what is possible and what is not.
Use checkpoints. Share drafts. Be clear about rounds of revision. Creative edits can become subjective very quickly, so clarity up front saves you hours later.
Also, protect your files. Save layered versions in case they want changes later. Even if the final image is flattened, your working file is part of the value you deliver.
Main Takeaway
Creative retouching is not just about making images prettier. It is about turning photographs into visual stories. You are not just cleaning up pixels. You are designing mood, emotion, and meaning.
Whether you are compositing dreamlike scenes, shifting colors to create drama, or adding light that never existed, the goal stays the same. Make something that feels intentional. Make something that moves people.
This kind of work takes time. It takes practice. But it also takes play. So experiment. Try new techniques. Steal ideas and twist them into your own. Not every edit needs to be loud. Some of the best ones whisper.
If you are new, start with one idea. Build a small project. Let the process guide you. And when you finish, share it. Because creative retouching is not just about what you make — it is about how you grow along the way.


.png)
.png)