.png)

How to Optimize Images for the Web: The Complete Guide to Faster, Sharper Ecommerce Sites
Importance of Image Optimization for Ecommerce
Boost Site Speed and Performance
Speed sells. Every kilobyte shaved off your images subtracts from load time. That means pages appear faster, scroll smoother, and convert better. On a mobile connection, an oversized hero image can be the difference between a sale and a bounce. Google’s Core Web Vitals measure your loading speeds — miss the mark and you're buried under competitors with sleeker sites.
Ecommerce brands live or die by milliseconds. Optimized images load at lightning speed. They keep users on the page, increase the number of pages viewed, and reduce abandoned carts. It’s performance marketing disguised as smart design.
Enhance User Experience and Engagement
A laggy product gallery makes shoppers scroll away. Crisp, fast-loading visuals keep them interested. When images load before a customer blinks, it creates flow. They explore more products, zoom in with ease, and stay in your store longer.
Great UX isn’t flashy — it’s invisible. Visitors shouldn’t notice image transitions or wait for a photo to render. They should glide through your catalog like it's tailored just for them. That’s how visual storytelling drives conversions.
Improve SEO Rankings
Google doesn’t buy from your store, but it decides who sees it. Optimized images boost rankings through faster load times, improved mobile performance, and intelligent use of alt text. Every image is a chance to communicate relevance and intent to search engines.
Large, unoptimized images drag down page speed — a core ranking factor. When your visuals are fast and searchable, crawlers love them. And when image search leads users to your product detail page, that's free traffic from people already looking to buy.
Understanding Image Formats
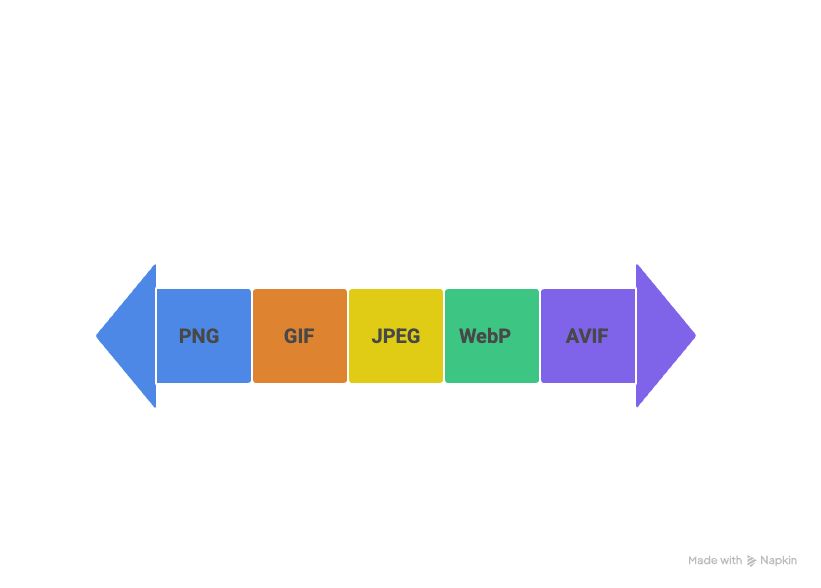
Common Image Formats for Web Use
Think of image formats like containers — some are light, some are heavy, and each serves a purpose. The usual suspects are:
- JPEG: Perfect for detailed, colorful photos like apparel or lifestyle imagery.
- PNG: Great for graphics with transparency or sharp edges, like icons or logos.
- GIF: Mostly phased out for still images, but still used for simple motion.
- WebP: A newer format that balances quality and file size better than JPEG or PNG.
- AVIF: Even leaner than WebP, offering sharper results at lower file sizes.
Choosing the right one comes down to balancing quality, transparency, and speed.
Pros and Cons of JPEG, PNG, GIF, AVIF, and WebP
Each format has strengths — but also traps if misused.
- JPEG
Pros: Small file sizes, wide compatibility.
Cons: Compression artifacts, no transparency. - PNG
Pros: Lossless compression, supports transparency.
Cons: Bulky files, not ideal for photo-heavy pages. - GIF
Pros: OK for basic animation.
Cons: Poor color range, outdated for static images. - WebP
Pros: Sharp visuals, tiny file sizes, transparency support.
Cons: Not universally supported in every browser. - AVIF
Pros: Superior compression and quality.
Cons: Slower to encode, not yet standard across all platforms.
Photo-heavy ecommerce brands often adopt WebP or AVIF for speed without sacrificing image integrity.
How to Optimize Images for the Web
Choose the Right File Format
Start here. It’s one decision that sets the tone for everything downstream. For product imagery, JPEG handles realism with minimal size. For logos or UI elements, PNG’s transparency is gold. To go modern, WebP or AVIF delivers superior compression — but only if your site infrastructure supports it.
Don’t default to what your camera or photographer gives you. Adjust formats based on where the image will live and how fast it needs to load.
Resize Images Before Upload
Uploading a 4000-pixel wide image for a 400-pixel display spot is slow-motion sabotage. Resize before the upload. Match image dimensions to their display container — not what looks sharp on a 5K monitor.
Many brands overlook this step in batch uploads, leading to bloated pages. Smart scaling keeps your visuals crisp and fast. It also means your CMS or storefront platform doesn’t waste time downsampling on the fly.
Use Compression Techniques
Great compression is invisible. Customers shouldn’t see it, search engines should feel it.
Use tools that preserve visual quality while reducing file size. Software like Photoshop, TinyPNG, ImageOptim, or AI-driven tools can cut unnecessary bytes. Pixofix integrates these decisions into the editing process itself — adjusting compression based on how the image will be delivered and viewed. One product image might need high-res sharpness for zoom, another might just need to load instantly in a category grid.
Compression is about control. Don’t leave it to chance.
Remove Unnecessary Metadata
Cameras record hidden data into every image file — like shutter speed, GPS coordinates, even author names. On the web, this metadata is dead weight.
Stripping it doesn’t affect visuals, just reduces file bloat. It's like clearing the luggage out of your images before they board the web. Tools like ExifTool or built-in export settings in Photoshop or Lightroom can automate this step.
For large-scale ecommerce brands, removing metadata also protects brand workflows from leaking into public files — a subtle but real security bonus.
Compression Techniques Explained
Lossy vs. Lossless Compression
Lossless retains every pixel, resulting in a bigger file. It's ideal when precision matters. Think icons, overlays, or technical files. Lossy discards non-essential data to cut file size. It's what makes JPEG king for product shots — you compress, evaluate, and adjust until it looks just right.
The trick is matching method to message. Lifestyle imagery can often handle lossy compression. Product close-ups might demand lossless. Knowing where each lives helps you make the right call.
Smart Compression Algorithms
Not all compression is brute force. Smart algorithms analyze content and target areas where detail loss won’t be noticed — like large flat backgrounds or gentle gradients.
Modern tools use AI-driven insight to apply variable compression across one image. That means your garment textures stay rich, while the shadows behind the model get trimmed smoothly. Pixofix leverages these techniques during retouching to ensure final assets retain brand storytelling without the unnecessary bytes.
The best compression feels intentional — not destructive.
Using Tools for Compression
Compression tools range from simple web apps to pro-grade software:
- TinyPNG: Fast online optimizer for JPEG and PNG.
- Photoshop: Full export control for both lossy and lossless settings.
- Squoosh: Browser-based app from Google for format comparisons.
- Capture One or Lightroom: Built-in export presets for batch image adjustments.
Within production teams, Pixofix can integrate these tools or use its proprietary pipeline to deliver files that are ready for upload — with the right format, size, and compression baked in.
The goal isn’t just smaller files. It’s sharper images that serve faster.
Image Optimization Workflow for Ecommerce
Step-by-Step Editing Playbook
- Set standards. Define file types, dimensions, and compression levels.
- Ingest raw images. Flag low-quality sources early to reduce manual edits later.
- Edit with brand feel in mind — no generic filters. Craft visual storytelling.
- Compress smartly. Use lossy or lossless based on context.
- Strip metadata. Reduce clutter, protect creative workflows.
- Final QA. Zoom in. Check lighting consistency. Look for edge artifacts.
- Export and sort by use case: product page, thumbnails, ads, social.
Recommended Tools for Optimization
- Photoshop: Precision editing and expandable export formats.
- Capture One: Great for tethered studio shoots, precise color control.
- ImageOptim: Lossless compression with drag-and-drop simplicity.
- Web apps like Squoosh or TinyPNG: For quick fixes and comparisons.
- DAM Platforms: To manage, version, and distribute assets fast.
- Canva: Very user-friendly and easy to export images in various formats, sizes and aspect ratios
In ecommerce studios that run fast, tools don’t just need to be powerful — they need to be scalable. Pixofix slots into these workflows to ensure quality doesn’t break under volume.
Automating Your Image Workflow
At scale, hand-editing every image doesn’t fly. That’s where automation unlocks serious velocity.
Use batch scripts for resizing and export presets for consistency. Integrate AI tools to detect and enhance lighting or correct color balance. Build a repeatable workflow that reduces human error and speeds delivery.
Pixofix partners with brands and studios to automate repetitive tasks — background cleanup, file renaming, even consistent padding across collections. Their hybrid system blends automation with human checks, so creative directors get speed without sacrificing visual voice.
The goal isn’t just automated outputs. It’s automated excellence.## Visual Examples and Comparisons
Before and After Optimization
Visual proof beats theory every time. Show a product photo before and after web optimization, and the impact is obvious — not just in file size, but in how fast it loads and how clean it looks at actual display sizes.
Before: A 3MB JPEG straight from the camera. Sharp detail, yes — but bloated. It stalls the page and punishes mobile users.
After: The same shot compressed smartly to 200KB, background cleaned, metadata stripped, and downsized to match actual display dimensions. Side by side, you’ll barely see a difference in quality — but you will when the image loads in milliseconds.
Ecommerce brands working with Pixofix often see over 80% reductions in file size, with zero compromise in how their photos feel. That's not magic. It's method.
Comparing Different Formats Side by Side
Imagine the same product photographed and saved as JPEG, PNG, WebP, and AVIF. On a high-res screen, they might all look good at first glance. But zoom in and watch how the compression tells a different story.
JPEG: Slight color banding and softness in gradients.
PNG: Crystal clear, but at triple the file weight.
WebP: Near-JPEG quality at half the size. Great blend of detail and speed.
AVIF: Even smaller than WebP with cleaner shadows — but limited browser support may hold it back.
Use tools like Squoosh to load these side by side. The real-world takeaway? For most ecommerce use cases, WebP strikes the ideal balance. And for forward-thinking teams ready for next-gen platforms, AVIF is becoming the new benchmark — just make sure your stack supports it.
Common Mistakes to Avoid
Ignoring Mobile Optimization
This is where most brands trip. Desktop-sized images clog mobile bandwidth, delay rendering, and frustrate users in low-signal zones.
Not optimizing for mobile isn’t just an oversight — it's cutting your store off from the majority of its traffic. Responsive image sizing and format switching (think: WebP for mobile, JPEG fallback for edge cases) should be baked into your image delivery.
If you're not reviewing your photos on mobile before launch, you're flying blind.
Selecting Poor File Types
Slapping a PNG on every image is a fast track to sluggish pages. High-res JPEGs on UI elements? Same story in reverse. Wrong file types don’t just waste space — they obliterate speed.
Every asset should be matched to its purpose. Clean icon? PNG or SVG. Rich lifestyle imagery? JPEG or WebP. Transparencies? Choose wisely — format matters more when loading times decide bounce rates.
Pixofix advises brands on these choices daily, so each asset works at peak performance, no matter where it lands.
Not Testing Performance Impact
Optimization isn’t finished when you export the file. You have to measure what that change actually did.
Ignoring real-world tests — like checking Largest Contentful Paint (LCP) or load time on 3G — leaves you guessing. What looks fine on Wi-Fi might be a friction point anywhere else.
Use performance audits via Chrome DevTools, Lighthouse, or integrated platforms like PageSpeed Insights. Know your metrics. Then decide if that 80KB hero shot is worth shaving to 60KB, or if it dulls the brand aesthetic.
Best Practices for Image Optimization
Create a Consistent Brand Look
It starts before compression — in the studio lighting, the model poses, and the editing tone. Every image you publish is a brand story in pixels.
Don't chase trends. Build consistency. A repeatable visual language across SKUs helps shoppers focus on what matters: the product. Clean backgrounds, aligned cropping, consistent exposure — these choices build brand trust faster than any promotion.
Pixofix helps ecommerce teams lock in this consistency. Not just on the hero shots, but in every thumbnail, alt angle, and retouch pass.
Optimize Alt Text and Descriptions
Alt text isn’t just for accessibility — it’s SEO ammunition.
Describe the image with purpose. Avoid stuffing keywords. Instead, explain what's in the photo in a natural voice: "Men’s navy wool blazer on mannequin with white background." That tells search engines and screen readers exactly what’s going on.
Make sure every product image has alt text that matches its intent. And use structured data if you want to feed Google even more context.
Monitor Image Loading Times
Optimized images only matter if they’re seen fast. Monitoring tools can show exactly where things clog.
Track image load times in your Core Web Vitals. Watch metrics like LCP to understand how your images affect overall page speed.
Use tools like WebPageTest, Pingdom, or an RUM platform to stress-test specific image sets — product pages, category grids, bundles. Flag the outliers and tighten the size, format, or delivery speed.
Performance is dynamic. Keep checking.
Metrics to Measure Image Performance
Key Performance Indicators to Track
Image performance isn't a gut feeling. It’s measurable.
Look at:
- Largest Contentful Paint (LCP): How long until your largest image renders.
- Image file size: Actual weight delivered to the browser.
- Load time on different devices and networks.
- Conversion rate drops on slow-loading pages.
- Bounce rate linked to visual-heavy sections.
All of these matter. But LCP is your north star. If it’s elevated, it’s probably an image dragging it down.
Track these KPIs every time you roll out a new campaign, photoshoot, or format test. Let data guide iteration.
Tools for Measuring Image Impact on Site Speed
The right tools peel back the curtain. Here are solid picks to measure how your images perform:
- Lighthouse (built into Chrome DevTools): Spot bottlenecks and visualize impact.
- WebPageTest: Simulates different devices and networks with visual load waterfalls.
- PageSpeed Insights: Google's take, with scoring and improvement tips.
- Cloudflare Images or Fastly: For delivery metrics if you're serving via CDN.
Pixofix often collaborates with brand performance teams to interpret these metrics and feed them back into visual production. It’s a loop — compression choices get smarter when you see their real business effect.


.png)
.png)