.png)
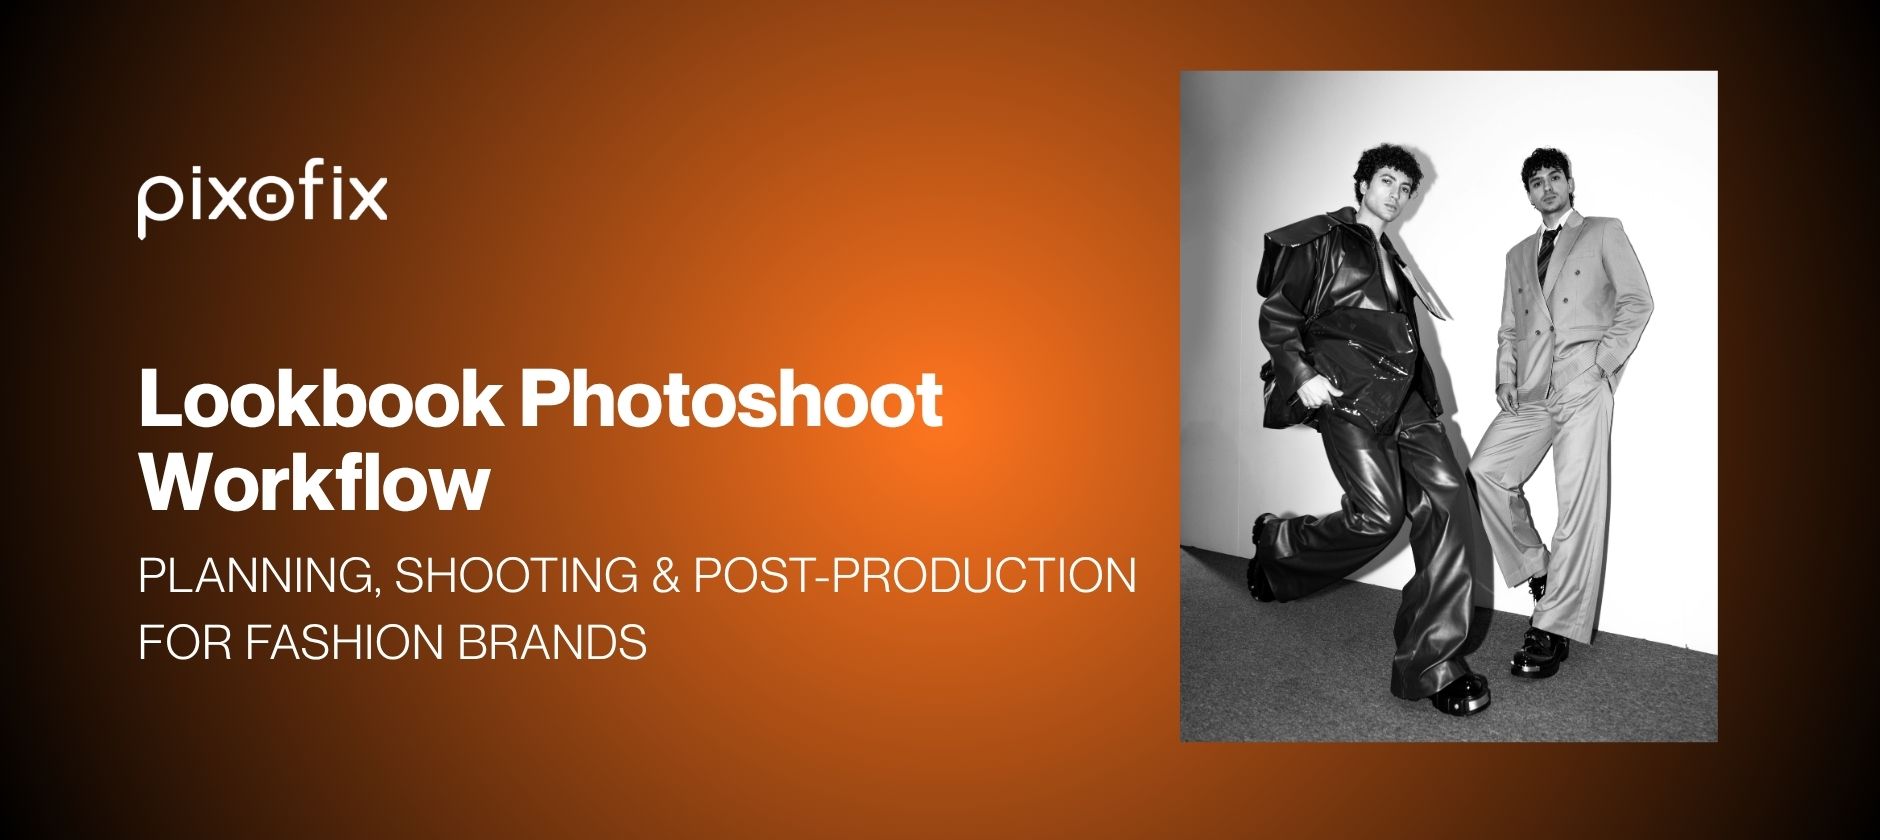
Lookbook Photoshoot Workflow: Planning, Shooting, and Post-Production for Fashion Brands
A lookbook shoot is one of the most production-intensive assets a fashion brand commissions, and one of the most frequently under-planned. Teams arrive on set without a locked shot list, brief the photographer on the day, and discover mid-shoot that the lighting does not hold across looks, the model casting does not match the collection's tone, or the post-production brief is too vague to produce a consistent image set. The result is a lookbook that looks like a collection of individual images rather than a cohesive campaign asset.
This guide covers the full production workflow: how to define the shoot's objectives and audience, how to build a shot list and mood board that actually direct the crew, how a lookbook shoot differs operationally from a catalog or campaign shoot, what lighting setup produces consistency across a multi-look set, how to manage the shoot day, and how to structure post-production and file handoff when the image volume exceeds what an internal team can process at speed.
What Is a Lookbook Photoshoot?
A lookbook photoshoot is a planned, styled photography session that produces a cohesive set of on-model or on-location images representing a brand's collection. The output is used for campaign content, wholesale presentations, seasonal launches, and editorial placements, not for product-on-white catalog images.
The defining characteristic is intentionality. Every element, including the model, the location, the lighting, the styling, and the sequencing of images, is pre-planned to communicate a specific brand mood and collection story. Where a catalog prioritizes completeness and clarity across every SKU, a lookbook prioritizes narrative and visual consistency across a curated selection.
A lookbook shoot differs from a campaign shoot in scope and deliverable. A campaign shoot typically produces hero imagery for a specific marketing activation: a launch, a brand film, a single hero asset. A lookbook shoot is broader, covering enough looks to represent the collection across all distribution channels, from DTC to trade buyers to press.
How to Plan a Lookbook Photoshoot
Every successful lookbook photoshoot starts long before the camera comes out.
What Should Your Lookbook Achieve Before You Start Shooting?
Start here: What do you want this lookbook photoshoot to do? Is it meant to attract retail buyers? Drive direct-to-consumer sales? Get picked up by a magazine? Each outcome shapes how you approach the shoot.
Then dig into your audience. Who are they? What do they care about? Are they minimalists who crave clean lines and muted palettes? Or bold dressers who live for texture and color? The answers guide your concept, styling, and locations.
Your message is the final piece. What emotion do you want the visuals to evoke? What story are you telling about this collection? Clarity here makes everything else click.
How to Build a Lookbook Mood Board That Actually Directs a Shoot
A strong mood board keeps everyone aligned and keeps the creative wheels turning.
Pull in references across fashion, photography, film, architecture, even nature. Focus on color palettes, lighting setups, model poses, and backdrops. Whether it's a moody warehouse shoot or sun-drenched coastal vibe, your board sets the tone.
Then, use it to communicate with your photographer, stylist, and creative team. This gets everyone on the same visual page before you’re on set burning daylight.
What Team Do You Need for a Lookbook Shoot?
Behind every slick lookbook is a small army of talent. Choose wisely.
- Photographer: Look for someone who gets your brand. Review their lighting, composition, and editing style.
- Stylist: Crucial for creating layered, interesting looks that read well on camera.
- Hair & makeup: They should match your visual direction. Clean and glowy? Or edgy and editorial?
- Assistants: Can be lifesavers on set. Steaming garments, holding reflectors, running point.
Next, cast models that align with your brand identity. If your clothes are made for real, diverse bodies, show that. If your vibe is edgy and niche, don’t cast it safe and polished. The model is the mood.
Logistics matter too. Scout your locations early. Get permits if needed. Build a tight shoot schedule. And map out wardrobe changes so the day flows without chaos.
How to Build a Lookbook Shot List
Before the first click, know exactly what you need to capture.
Break it down by:
- Full-body shots
- Close-ups (details like stitching, buttons, fabric textures)
- Action or lifestyle moments
- Product-on-hanger or flat lays
- Environmental context (wide shots showing location)
Then sketch a rough storyboard. How will images be arranged? Do you want to start bold and end soft? Group outfits by color? Use sequencing to build narrative or energy? Planning the layout in advance ensures you don’t miss anything.
Even a quick visual flowchart helps your team understand the end goal and shoot smarter.
Lookbook, Catalog, and Campaign Shoots: What Is the Difference?
Creative directors and ops leads managing multi-format production calendars regularly brief across all three shoot types in a single season. The briefs look similar on the surface: models, garments, a photographer, a post-production budget. The outputs serve entirely different functions, and conflating them at the planning stage is one of the most reliable ways to produce assets that do not perform their intended job.
What a lookbook shoot is built to do
A lookbook shoot produces a curated, narrative image set representing a collection. The selection of looks is intentional, not exhaustive. A brand with 120 SKUs in a seasonal drop does not need all 120 represented in the lookbook. It needs 12 to 20 looks that communicate the collection's mood, styling direction, and brand identity clearly enough that a buyer, press contact, or DTC customer understands what the collection stands for.
The output is structured for storytelling: full-body looks, detail crops, and environmental or lifestyle frames, sequenced to build and sustain a visual narrative across the full set. Lookbook images are used across campaign content, wholesale decks, press kits, editorial submissions, and seasonal marketing.
What a catalog shoot is built to do
A catalog shoot prioritizes completeness and technical consistency over narrative. Every SKU, every colorway, every required angle, shot against a controlled background at a consistent exposure. The deliverable is a product record, not a brand statement.
Catalog retouching standards are also different. The priority is accuracy: color fidelity to the physical garment, clean backgrounds, consistent crop ratios, and file specs that meet the requirements of each sales channel. Catalog assets go directly to product pages, retailer listings, and wholesale order forms. A catalog image that communicates the wrong color costs money in returns. One that communicates the wrong silhouette costs a buyer relationship.
What a campaign shoot is built to do
A campaign shoot is narrower in scope than a lookbook but carries more production weight per image. It typically produces a small number of hero assets for a specific marketing activation: a launch, a seasonal brand film, a paid social series, or a flagship creative for a single channel. Where a lookbook covers the collection broadly, a campaign shoot covers one idea deeply.
Campaign shoots require more detailed pre-production than either a lookbook or a catalog. The brief is more precise, the creative direction is more controlled, and the deliverables are fewer but more exacting. A campaign shoot for a product launch might produce three to five hero images that carry the full weight of the launch creative across every channel. Those images need to work at full-page print resolution, cropped to a 1:1 social frame, and pulled into a paid video cutdown, all from the same shoot day.
If a campaign shoot requires a detailed brief before the crew arrives on set, the right document to build is a structured art direction deck. The art direction brief guide on the Pixofix blog covers what that deck needs to include, how to structure deliverables by channel, and how to keep production sign-off tight.
Running all three in the same production cycle
Brands running seasonal launches often need all three shoot types within the same production window. The practical approach is to plan them as a single integrated shoot day or series of days, with distinct shot lists and clear handoff points between the three output types, rather than briefing them as three separate productions.
A single shoot day structured correctly can produce: the 15-look lookbook set, a 60-SKU catalog run of hero angles, and the three campaign hero frames, provided the lighting setup and art direction are sequenced intelligently and the retouching brief covers all three output standards separately. The post-production costs are shared across the three deliverables. The model, location, and crew fees are not multiplied.
How to Run a Lookbook Shoot Day
On the day of your lookbook photoshoot, everything you planned gets put to the test.
What Lighting Setup Works Best for Lookbook Photography?
Lookbook photography lighting has one requirement that overrides everything else: it must hold across the full set. A lighting change between look three and look seven does not just create an inconsistency, it breaks the narrative. Buyers and editors reading a lookbook notice immediately when the mood shifts mid-sequence without intention.
Natural light versus studio light
Natural light produces softness, organic shadow gradients, and the kind of skin rendering that reads well in editorial contexts. It works for lookbooks with an outdoor, lifestyle, or seasonal brand mood. The operational problem is consistency. Cloud cover, sun angle, and time of day all change the quality of natural light across a shoot day. If you shoot five looks in direct sun and three in open shade, the set will not hold together in post.
Studio lighting gives you repeatability. The same setup, the same ratios, the same output for every look. For brands shooting 10 to 20 looks in a single day, studio control is not a stylistic choice; it is a production requirement.
Key-to-fill ratio for fashion
For lookbook work, a 2:1 or 3:1 key-to-fill ratio is a practical starting point. It produces enough shadow to give garments dimension and show fabric structure, without going so contrasty that texture detail is lost in the darks. A flat 1:1 ratio, sometimes used for catalog work, flattens the image and removes the depth that makes a lookbook feel like a campaign asset rather than a product record.
Position the key light at roughly 45 degrees to the subject, elevated above eye level. This creates the cheekbone shadow and garment drape definition that reads well across both full-body and detail crops. Adjust based on the garment: high-contrast prints and heavy textures tolerate a lower ratio; flat-color knitwear and matte fabrics benefit from slightly more directionality to show surface quality.
Rim lighting and separation
A rim or hair light separating the subject from the background is worth the setup time on darker garments. Without separation, a navy jacket against a grey backdrop merges at the shoulder. A subtle rim prevents this without affecting the mood of the main lighting setup.
Maintaining consistency across looks
Mark your light positions on the floor with tape before the first model steps in. Document the exact power settings on each unit. Shoot a grey card or ColorChecker passport at the start of each lighting setup and again after any break or adjustment. This gives the retoucher a calibrated reference point for every look, which cuts color correction time significantly and ensures the full set lands with the same tonal quality in post.
Camera settings for lookbook shoots
Aperture between f/5.6 and f/8 covers most lookbook work. It keeps the garment sharp front to back while allowing enough subject-background separation to prevent the image reading as a flat catalog shot. Shoot tethered where possible; it lets the creative director and stylist review images on a monitor rather than on camera, which speeds up adjustments and avoids reshoots caused by issues that were only visible at full resolution.
Shoot in RAW. Lookbook retouching often involves fine color work on fabrics, and RAW files give the retoucher latitude that compressed JPEGs do not. If you are handing off to an external post-production team, standardize your file naming and color profile before the shoot ends.
How to Prepare Garments and Fittings Before a Lookbook Shoot
Garments don’t always behave on set the way they do in real life.
That’s why pre-fittings are your friend. Try on every look in advance. Check how pieces layer, where they bunch, what accessories clash. On shoot day, expect on-the-fly fixes: pinning, taping, steaming, rolling sleeves, adjusting collars.
Have a steamer, lint roller, and sewing kit within arm’s reach. A flawless outfit on camera often requires behind-the-scenes magic.
How to Direct Models for Lookbook Shots
Your model is the face of the story but they need direction to tell it right.
Guide poses that highlight garment structure, flow, and texture. Turn, twist, sit, walk. Mix static hero shots with in-motion captures to keep things dynamic. Use props or furniture if it fits your concept.
Keep the vibe relaxed. A nervous model reads stiff. Encourage movement and micro-emotions. Let them play a little. The best shots often happen between the planned ones.
How to Manage a Lookbook Shoot Schedule
Shoots can spiral fast. The key is pacing.
Stick to your shot list. Build in buffer time for wardrobe changes and location shifts. If something’s not working, pivot quickly, don’t force it. Assign someone to keep an eye on the schedule so the creative team can stay in the zone.
Also, watch the energy. Long shoots are tiring. Play music. Offer snacks. Keep the vibe collaborative. Happy teams make better images.
What Legal and Usage Rights Do You Need to Secure for a Lookbook Shoot?
This one’s not exciting, but it is essential.
Get signed release forms from all models and contributors. Clearly define usage rights with your photographer and team. Make sure everyone knows where and how the images will be used.
Also check copyright on any props, backdrops, or locations. If you’re shooting in a private venue or using recognizable trademarks, get permission in writing.
The last thing you want is a legal mess after your lookbook drops.
How to Manage Lookbook Post-Production: From Culling to Final Retouched Set
How to Cull a Lookbook Shoot Without Losing a Week
Once the lookbook photoshoot wraps, the real work begins. You’ll have hundreds, maybe thousands, of images. Your first job is to cut them down.
Look for shots that hit the mark emotionally and visually. Do they match the mood and message you planned? Are the garments shown clearly? Are expressions and poses natural? Pick only the strongest images. Quality beats quantity every time.
Also, think about flow. Each selected image should play a role in the larger narrative, not just look good on its own.
What Does Lookbook Retouching Actually Require?
Now polish but don’t overdo it.
Start with color correction and exposure adjustments. Make sure skin tones look real, fabrics match their true shades, and lighting feels consistent.
Retouching should be subtle. Clean up stray hairs, wrinkles in clothes, or small distractions, but keep the texture and life in the image. Over-smoothed skin or flattened colors kill the authenticity.
Aim for cohesiveness across the full set. It should feel like one collection, not a patchwork of different styles.
How Should You Design and Layout a Lookbook?
This is where it all comes together.
Design your lookbook like a story. Think about pacing, image size, white space, and any text you need to include. Less is more. If you add captions, keep them minimal: product name, fabric details, maybe a short brand line.
Pay attention to spacing. Let images breathe. Use contrast between full bleeds and margins to guide the eye.
Plan for the final format. If it’s going to print, make sure you use high-resolution files and add bleed margins. For digital, make it easy to swipe, scroll, or zoom. A flipbook or responsive web layout often works better than a static PDF.
How to Handle Post-Production When Your Lookbook Shoot Runs at Scale
A 20-look lookbook shoot with two to three angles per look, detail crops, and colorway variants can produce 300 to 500 selects before the retoucher opens a single file. For an internal team managing this alongside catalog production and seasonal deadlines, that volume is a bottleneck before it is a deliverable.
The production constraint is not skill; it is throughput. Lookbook retouching requires a different level of attention than standard catalog work. Skin, garment drape, color fidelity across the full set, and subtle lighting corrections all take time per image that compounds quickly at scale. A 400-image lookbook set at 20 minutes per image is 133 hours of retouching. That is three weeks for a single retoucher working full time, on one project.
What a high-volume retouching pipeline covers for lookbook work
A structured post-production pipeline for lookbook assets typically handles the following in sequence: color calibration across the full set using the ColorChecker reference frames shot on the day; skin retouching to a consistent standard without over-smoothing; garment cleanup including stray threads, visible clips, tape lines, and steaming wrinkles that made it past the shoot day; background work where needed; and final crop and export to the required aspect ratios for each channel.
The output is a consistent image set, not a collection of individually strong images. That distinction matters. A lookbook where some images are color-graded warmer than others, or where skin retouching varies between a light pass and a heavy retouch, loses the visual coherence that makes the lookbook work as a campaign asset.
File handoff and turnaround
Brands handing off to an external retouching team should provide: RAW files organized by look, the ColorChecker or grey card reference frame for each setup, a written style guide covering retouch level, color temperature target, and any brand-specific rules (e.g. no frequency separation on skin, or a specific crop ratio for the brand's DTC homepage), and clear file naming that maps to the product catalog.
With that brief in place, a team processing 5,000 images per day with a 3-layer QA structure can turn a 400-image lookbook set in 24 to 48 hours. Pixofix's high-end retouching service is built for exactly this workflow: AI-assisted processing on the first pass, human retouchers on the detail work, and a QA layer before final delivery.
Extracting PDP assets from the same shoot
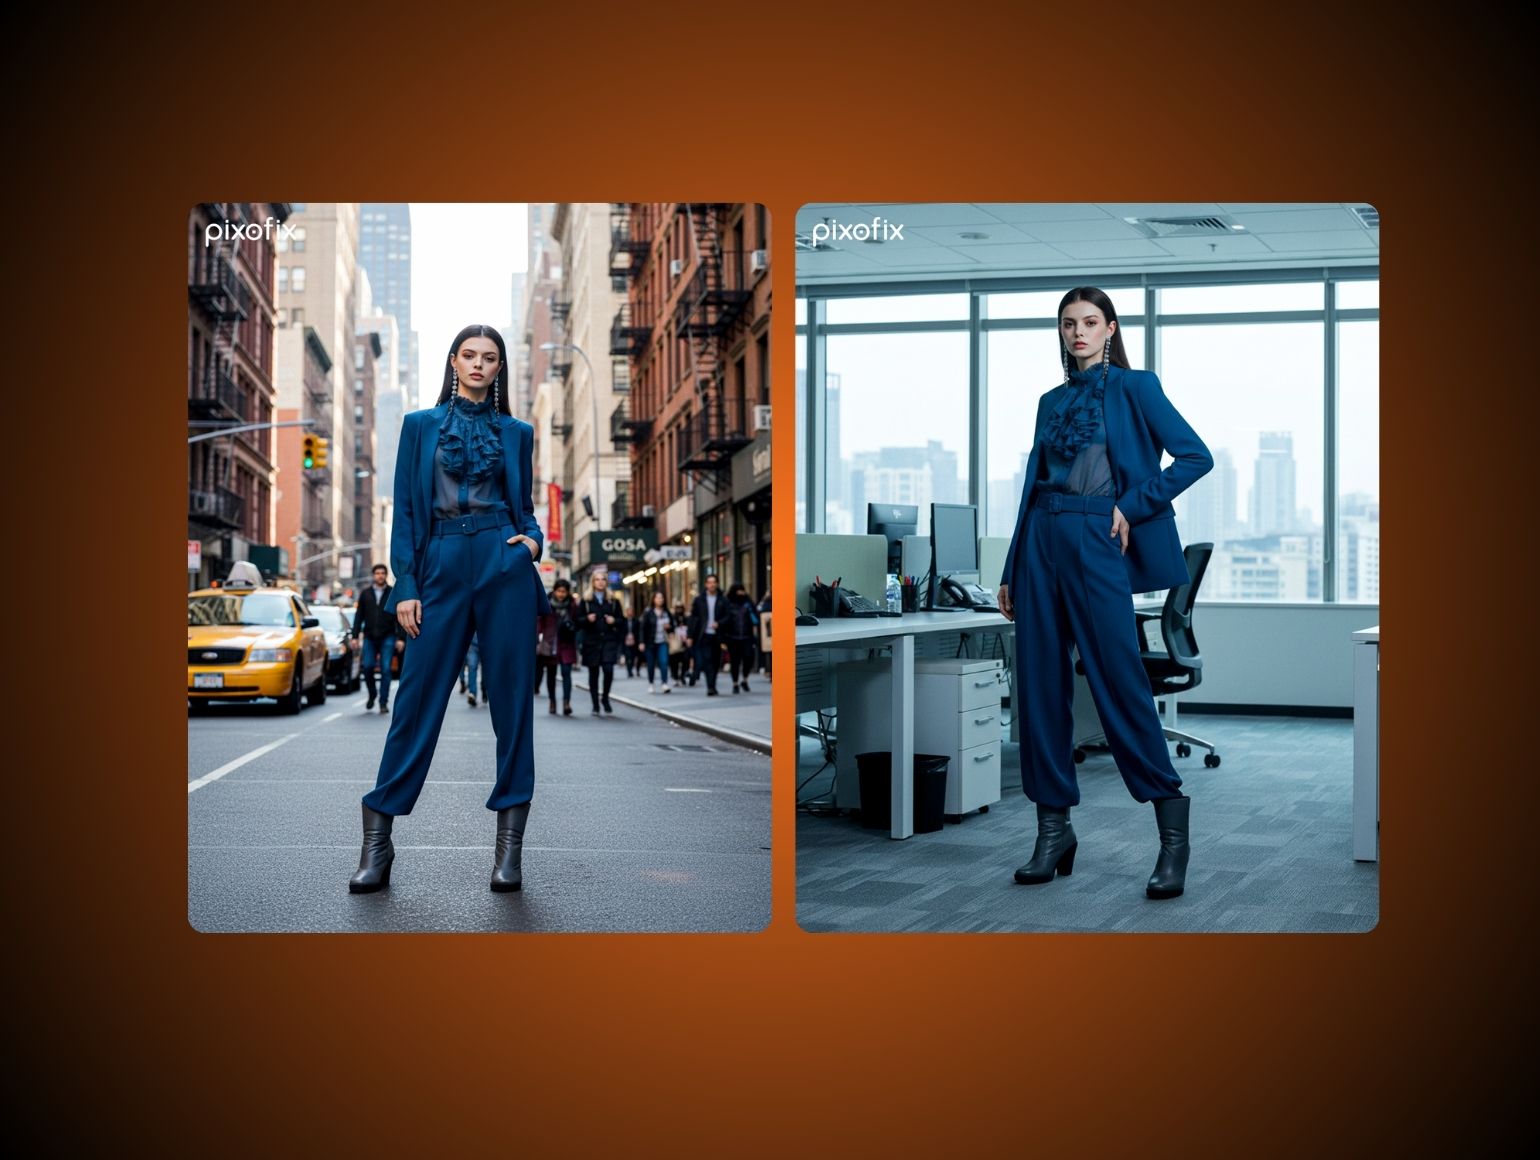
A well-planned lookbook shoot can also yield clean PDP assets if the shot list includes at least one straight-on, well-lit product frame per look. These can be separated during culling and processed on a standard AI PDP production pipeline at the same time as the lookbook set, giving the brand both campaign imagery and product page assets from a single shoot day.
The cost per asset drops significantly when both pipelines run in parallel rather than sequentially. For brands that need campaign-grade imagery on a faster timeline than a full shoot allows, AI-generated lookbook assets can replace or supplement the physical shoot entirely.
The difference between a lookbook that performs and one that does not is almost never the photography. It is the production discipline that surrounds it: the shot list built before the crew arrives, the lighting documented so the retoucher has a reference, the post-production brief specific enough that the image set comes back consistent rather than individually corrected. Brands that treat the lookbook as a production system rather than a creative event get more usable assets per shoot day, shorter post timelines, and a final image set that holds together across every channel it is deployed to. For teams managing that volume of output across multiple seasonal drops, Pixofix's high-end retouching service handles the post-production pipeline from RAW file to final delivery, at the speed and consistency that catalog-scale lookbook production requires.
Ready to take lookbook post-production off your plate? Send your RAW files and style guide to Pixofix and receive a fully retouched sample set from your next lookbook shoot within 48 hours, free and with no commitment. Get your free sample.


.png)
.png)