.png)
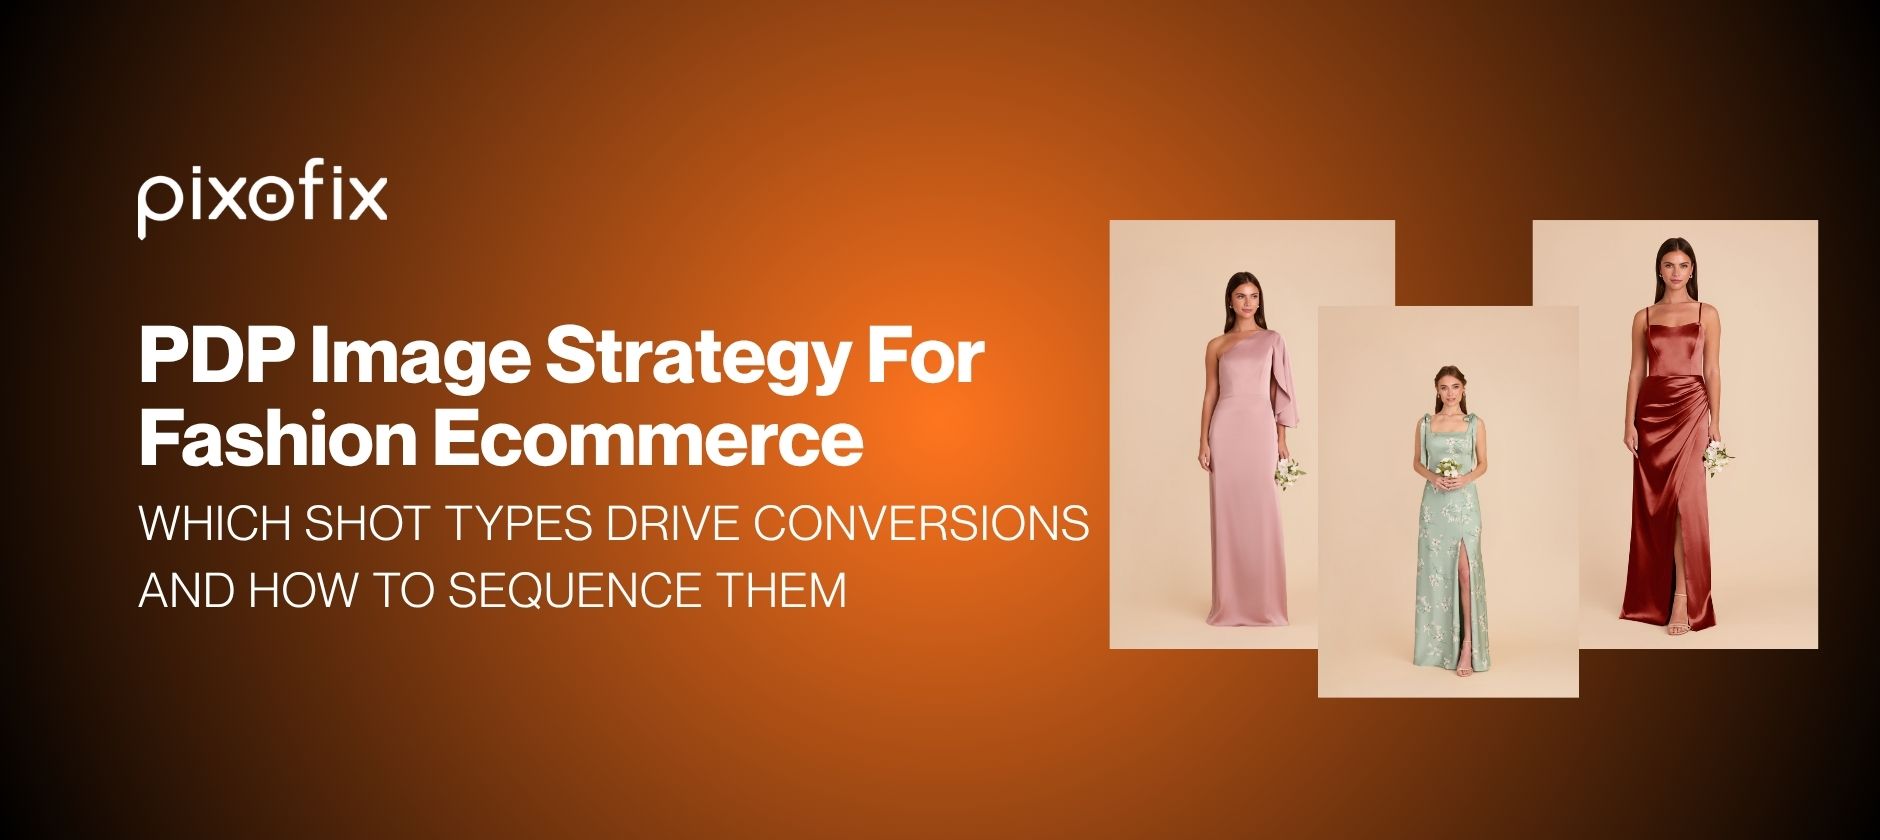
PDP Image Strategy For Fashion Ecommerce: Which Shot Types Drive Conversions And How To Sequence Them
Most fashion PDPs leak revenue in plain sight. The imagery exists, the retouching is competent, and the creative direction looks fine in a deck. But the shot sequence answers the wrong questions at the wrong moment, the mobile carousel buries the frame that would have closed the sale, and the retoucher brief says "make it look beautiful" rather than "this image must remove a specific objection."
When you manage 500 to 10,000 SKUs per season, your PDP image strategy for fashion ecommerce is no longer a creative preference. It is a conversion system. The question is not which angles look best. The question is which shot types drive which purchase behaviors, in what order, on a 390-pixel mobile screen, across every category and price tier in your catalog.
This article is built for creative directors planning seasonal catalog shoots. It covers the six core shot types and what conversion job each one performs, how to sequence a mobile-first carousel by category, what the evidence says about image count at different price points, and how to write a retoucher brief that optimizes for conversion rather than aesthetics.
The Six Shot Types And Their Conversion Jobs
Before sequencing, you need a shared vocabulary. Fashion ecommerce images collapse into six functional types. Every frame you commission should map to one of these, or it does not belong on the PDP.
Ghost mannequin photography occupies a hybrid position. It is on-model in structure but packshot in sterility. It answers silhouette questions without the aspiration layer that a human model adds. Treat it as a subcategory of on-model with different conversion properties, discussed below.
Each shot type performs differently depending on category, price point, and where it appears in the swipe sequence. The mistake most teams make is treating all six as interchangeable and ranking them by habit or personal preference rather than by conversion data from their own catalog.
How Each Shot Type Moves Conversion
Understanding the conversion mechanism of each shot type is the foundation for briefing your studio and your retouchers correctly.
Hero: The Click Driver
The hero image does not sell the product. It earns the tap into the PDP. Its job is instant category recognition and differentiation in a grid where every competing product is a thumbnail.
Conversion behavior the hero drives: grid click-through rate (CTR) and first impression retention, meaning whether the shopper stays on the page for more than three seconds.
What that means for your brief:
- Clarity over creativity. Every creative choice that reduces immediate product comprehension costs you CTR.
- Background must be brand-consistent and neutral enough that the product reads first. Tested exceptions exist, but they need data behind them.
- Cropping rules matter. For footwear, the full sole must be visible. For bags, all four corners. For tops, the full shoulder and at minimum mid-thigh. Cropping off key silhouette edges forces the shopper to infer what they cannot see, and they bounce instead.
- Shadows under AI-generated backgrounds shift perceived color on neutrals, blacks, and whites. Specify acceptable shadow depth in your brief.
Hero images are the most A/B-tested image type in fashion ecommerce, yet most creative directors write the loosest briefs for them, relying on vague phrases like "clean and consistent." A conversion-oriented hero brief specifies the exact angle, background color hex or LAB value, minimum product-to-frame ratio, and which edges must never be cropped.
On-Model: The Fit Decision
On-model is the highest-stakes shot type for apparel. It answers the most expensive return reason in fashion: "the fit was not what I expected."
Conversion behavior on-model drives: add-to-cart rate, return rate reduction, and time on page.
The critical distinction is between aspirational on-model and functional on-model. A runway-influenced editorial shot sells a mood. A correctly briefed functional on-model shot communicates:
- How the garment sits at the shoulder.
- Where the hem falls relative to a known body height.
- How the fabric behaves when standing still versus in motion.
- Whether the fit reads as the size it is labeled.
For a conversion brief, the model's height, the heel height if relevant, and the camera focal length and height must be fixed per category. A 50mm lens at 1.2 meters height for tops. A wider shot from 1.5 meters for dresses and outerwear. Changing these between shoots creates fit distortion that is invisible to the eye but translates into shopper confusion and returns.
Ghost mannequin photography trades the aspiration layer for perfect product fidelity. It works best in categories where the shopper's primary question is construction rather than fit on a body, such as structured tailoring, technical outerwear, and knitwear where yarn texture is the object. It performs below on-body shoots on apparel where drape and movement matter, including wovens, silk, and occasion dresses.
Detail: The Objection Remover
Detail shots perform a precise function: they remove the objection that would otherwise cause a shopper to abandon rather than convert, or to return after purchasing.
Conversion behavior detail drives: reduction in "material did not meet expectations" returns, increase in conversion rate on premium price points where quality proof is required before purchase.
The objection to remove varies by category. This is not a decision your retoucher should make. It belongs in the creative director's brief, mapped from your return reason data.
The brief for a detail shot must specify: exact crop area, focal length or reproduction ratio, whether the shot is in context on garment or isolated, and what the shot must make visible that was ambiguous at full-product scale.
Flat Lay: Color Truth And Surface
Flat lay images earn their place when you need to show color accuracy and fabric surface detail without the shape distortion introduced by a body or mannequin.
Conversion behavior flat lay drives: color confidence before purchase, particularly for repeat buyers who know your brand's color calibration and use flat lays as a reference.
Flat lays are often underused on PDPs and overused in marketing content. On a PDP, a flat lay has specific utility:
- Show a print or pattern at its actual scale.
- Show a fabric surface that reads differently when draped, such as velvet, sequins, or heavy brocade.
- Provide a technically accurate color reference when on-model lighting has introduced warmth or shadow.
- Show internal construction elements, such as pocket placement or interior pockets in a jacket.
The most common flat lay mistake in retouching briefs is asking for the image to "pop." A flat lay that pops has boosted contrast and saturation. A flat lay that converts has accurate color against a known reference. Your brief should specify the background color's LAB value, not its aesthetic quality.
Lifestyle: Desire And Projection
Lifestyle images convert by answering a question the shopper is not always conscious of: "Can I picture myself in this?"
Conversion behavior lifestyle drives: average order value, aspirational brand perception, and repeat purchase rate. Lifestyle rarely drives first-purchase conversion on its own. It reinforces a decision that the functional shots have already enabled.
The common mistake is placing lifestyle frames early in the carousel because they look impressive. On mobile, where the first two or three frames determine whether the shopper stays, leading with a lifestyle image that obscures fit, color, and scale is a conversion error. The shopper cannot buy aspirational light. They buy a garment.
Lifestyle's position is earned, not default. It belongs after the shopper has the functional answers they need. In a mobile carousel of ten images, frames one through five should be functional. Lifestyle enters at frame six or later, unless your data says otherwise for a specific category.
For premium brands, the calculus shifts slightly. High average order value shoppers often scan PDPs more slowly, with higher attention to brand narrative. A single strong lifestyle frame in position three or four can support willingness to pay without sacrificing functional clarity, provided the earlier frames have covered hero, on-model, and detail.
Packshot: The Technical Identity Image
Packshots are underrated on direct-to-consumer PDPs and essential on multi-channel distribution. For wholesale, marketplace, and catalog use, a clean packshot on white is non-negotiable.
On a direct PDP, the packshot earns a position when:
- The product has complex exterior construction that the hero angle cannot fully capture.
- Multiple colorways exist and the brand needs a technically accurate reference frame for each.
- The category is accessories where the hero handles front and the packshot covers an angle the hero cannot.
Packshots are the shot type where retouching briefs most often default to "clean background, remove dust." A conversion brief for a packshot also specifies: which angle, whether the product should appear to float or cast a natural shadow, and what the packshot must communicate that no other frame in the sequence covers.
Mobile-First Carousel Sequencing By Category
A desktop PDP can carry a longer image sequence because shoppers see a thumbnail rail and can jump to any frame. On mobile, they swipe. The frames they see in the first two or three swipes are the frames most likely to influence conversion. Everything after frame five is seen by a minority of mobile shoppers.
The implication is structural: you are not building a sequence for a viewer who will look at all ten images. You are building the first three frames as a conversion unit, and the remaining frames as supporting evidence for a smaller but still valuable segment of high-intent shoppers.
The Mobile-First Sequencing Principle
Frame one is not optional. Frame two is contested. Frame three must close the primary objection.
Design every PDP sequence with this question: if a shopper only sees frames one, two, and three, do they have enough information to make a confident purchase decision?
For most apparel categories, the answer requires:
- Frame 1: Hero that drives click and confirms the product matches the thumbnail expectation.
- Frame 2: On-model that establishes fit, length, and body proportion at a glance.
- Frame 3: Detail or back view that removes the specific objection most likely to cause this shopper to hesitate.
Lifestyle, additional angles, and UGC fill frames four through ten for the shopper who wants more before committing.
Recommended Sequences By Category
The following sequences are starting points calibrated to mobile-first conversion logic. Your return reason data and A/B tests should refine these over time.
Image Count By Category And Price Point
There is no universal ideal image count. The right number is determined by the complexity of the purchase decision for that product type at that price point.
A ten-dollar basic tee and a four-hundred-dollar structured coat both appear on PDPs, but the shopper's due diligence is not comparable. The coat shopper will swipe further, scrutinize more frames, and hold higher expectations of completeness. Giving them the same image count as the tee is a conversion failure.
The following ranges reflect the functional requirements of each tier, not a budget allocation. If your workflow cannot produce the images for a given tier, the solution is to fix the workflow, not to compress the image count on high-value SKUs.
These ranges should be used as minimums for high-intent category pages and primary navigation, not as maximums to fill. If an image does not answer a distinct shopper question, it costs load time, post-production budget, and scroll attention without returning conversion value.
How Price Point Changes The Image Strategy
The image strategy for a $40 dress and a $400 dress are not the same strategy applied at different volumes. They are different systems solving different conversion problems.
At lower price points, the shopper is making a faster, lower-commitment decision. Speed of comprehension matters more than depth of coverage. The hero and on-model frames carry most of the weight. Three strong frames outperform eight mediocre ones.
At mid-tier price points, the shopper spends more time on page, compares alternatives, and expects coverage of both fit and material quality. This is the range where detail shots and back views move from optional to essential.
At premium price points, the shopper has higher expectations of everything: image quality, color accuracy, editorial coherence, and the absence of any visual anomaly. A slightly mismatched catchlight between frames, an AI-generated hand with three fingers at incorrect proportion, or a color shift between the hero and the lifestyle frame is noticed. Premium shoppers have seen enough product photography to read inconsistency as a quality signal about the brand, not just the image.
The retouching brief must reflect this. A premium PDP brief specifies color fidelity in LAB tolerances, not just "accurate." It specifies that AI-generated frames require human final sign-off at 100 percent zoom. It specifies which images carry brand color-critical elements, such as a signature hardware finish or a hero neutral, and what the acceptable deviation is.
How To Brief A Retoucher For Conversion, Not Aesthetics
Most retouching briefs are aesthetic briefs: clean background, good skin, consistent whites, remove blemishes. They tell the retoucher what the image should look like. A conversion brief tells the retoucher what the image must accomplish.
The distinction sounds subtle. The output difference is significant.
Define The Image's Conversion Job In The Brief
For every image type in the sequence, the brief should state:
- What question this image answers for the shopper.
- What the shopper should be able to conclude after seeing this frame.
- What would make this image fail its conversion job.
Example for a denim detail shot:
"This detail frame answers the question 'what does the wash actually look like at wearing distance?' The shopper should be able to see the true dye color on a natural fold, not a stretched flat. This image fails if it shows a saturated, over-processed wash that differs from how the garment photographs in the on-model frame. Preserve visible dye variation. Do not boost saturation. Crop should sit at mid-thigh on a natural fold."
Compare this to a typical brief: "Detail shot, clean, consistent with the rest of the set." The first brief gives the retoucher decision-making criteria. The second gives them permission to make aesthetically guided choices that may or may not serve conversion.
Specify Consistency Requirements Across A Sequence
A single strong image does not make a strong PDP. Inconsistency across a sequence breaks trust in ways the shopper rarely articulates but consistently acts on by leaving.
Your brief should define cross-frame consistency requirements:
Specify AI Intervention Limits
If AI tools are part of your post-production pipeline, your retouching brief must specify where AI is permitted and where human oversight is required. A brief that does not address this leaves the retoucher to make judgment calls that compound across a catalog into visible inconsistency.
A functional AI boundary specification in a brief:
"AI background generation is permitted for frames 6 through 8 (lifestyle and alternate background frames) only. Frames 1 through 5 must use human-reviewed backgrounds. All AI outputs require 100% zoom human review before approval. AI is not permitted to alter garment shape, generate or modify hands, or alter jewelry surfaces. Flag any AI output that requires more than three human correction passes for escalation rather than continued AI iteration."
This is not a vague preference. It is an operational gate that prevents the AI failure modes from entering the catalog undetected.
Build A Category-Specific QC Gate Into The Brief
A brief that ends at creative direction and does not define what passes QC is incomplete. For each shot type, define what would cause a rejection.
Example QC rejection criteria for on-model shots:
- Shoulder line not horizontal within 2 degrees.
- Hem length not matching reference within 0.5 centimeters at 1000-pixel output size.
- Catchlight position outside approved range.
- Skin saturation above or below LAB tolerance.
- Any finger or hand anomaly visible at 100 percent zoom.
- Color shift from approved hero colorway exceeding defined LAB delta.
These criteria give the studio a clear pass/fail gate and prevent the "looks fine to me" approvals that accumulate into catalog drift over a season.
The Fit Between Shot Types And Retouching Decisions
Different shot types require different retouching judgment calls. Consolidating all six into a single brief with generic quality guidance produces inconsistent output and misaligned retouching effort.
Hero Retouching Priorities
The hero image requires the most rigorous color accuracy because it sets the shopper's expectation for every other frame. If the hero is slightly warm, every subsequent frame will be evaluated against that warmth. The first retouching priority is white balance calibration against a defined reference, not aesthetic enhancement.
The second priority is silhouette clarity. Any shadow or distortion that obscures a key edge, such as a neckline, shoulder seam, or hem, must be corrected. AI background tools that introduce uncontrolled shadow gradients need human correction before the hero is approved.
On-Model Retouching Priorities
On-model retouching for conversion differs from traditional beauty retouching. Skin smoothing that erases the texture and visual weight of the garment against the body is a conversion failure on knitwear and textured fabrics. The retoucher's job is to represent the product accurately, not to produce an idealized image.
Specific priorities:
- Garment shape integrity takes priority over skin perfection. A crooked shoulder seam is a more serious defect than a visible pore.
- Color of the garment against the model's skin must be calibrated. Warm skin tones and complementary-colored garments interact in ways that shift apparent garment color. Address this in color correction, not in fabric desaturation.
- Movement and drape shots should preserve natural fabric physics. Over-smoothing a flowing dress removes the visual information that communicates fabric weight to the shopper.
Detail Retouching Priorities
Detail shots are where over-retouching is most damaging. The shopper is looking at a macro crop specifically to see what the material actually looks like. Heavy frequency separation that removes yarn nubs from knitwear, or local contrast adjustment that makes denim grain look machine-flat, fails the shot's conversion job even if the resulting image looks technically clean.
The brief should explicitly state: preserve visible fabric character. Clean dust and stray threads. Do not alter surface texture or remove visual grain that represents genuine material quality.
Flat Lay Retouching Priorities
Flat lays must be color-accurate above all other qualities. If a flat lay's saturation is boosted to look appealing in a thumbnail, it trains shoppers to expect a brighter product than arrives. The return reason "color looked different in photos" is frequently a flat lay calibration failure.
The retoucher brief for flat lays should specify the exact LAB values for brand colors and require color checking against those values before approval.
AI At 10 Images Versus 10,000: Where The Strategy Breaks
Many teams build a PDP image strategy using AI tools at small scale and find compelling results. The structure breaks when they push that strategy into full-catalog production.
AI image generators and enhancers can perform well on a controlled set of 10 to 20 assets. At 500 to 10,000 SKUs per month, subtle inconsistencies compound into visible catalog drift: color shifts between batches, garment shapes that drift between colorways, hands with incorrect anatomy on on-model shots, and fabric textures that flatten into plastic surfaces.
The failure is not the AI tool. The failure is treating AI output as final output rather than as an accelerant that still requires structured human QC to maintain catalog-level consistency.
Pixofix, working with 200-plus retouchers across the US, EU, and Asia with experience across more than five million retouched images, uses a hybrid model: AI generation and enhancement for speed, then mandatory human QC loops for consistency enforcement before any image goes into the DAM or PIM. This is not a workaround. It is the correct architecture for catalog-scale fashion ecommerce image production.
Each of these must be caught by your QC gate, not by shoppers reading your reviews.
Metrics That Tell You If Your Image Strategy Is Working
Changing your shot sequence or shot mix without measurement is decoration, not strategy. The metrics that track PDP image strategy for fashion ecommerce span three domains: front-end behavior, post-purchase performance, and production efficiency.
Front-End Metrics
- Grid-to-PDP CTR by primary image variation: Measures whether hero changes are improving click capture from search and category pages.
- Scroll depth into image carousel: Measures engagement with the full sequence. If 80 percent of mobile shoppers never reach frame four, your conversion-critical content must live in frames one through three.
- Add-to-cart rate by carousel exposure: Which frame is visible when the shopper adds to cart. If this clusters at frame two on apparel, your on-model is doing the heaviest lifting. If it clusters at frame five, your first four frames are not closing the primary objection.
- Image carousel interaction rate: Are shoppers swiping, or stopping at frame one? Low interaction on a strong product may signal a weak hero that does not invite further exploration.
Post-Purchase Metrics
- Return rate by shot sequence: After changing shot order or shot type, does return rate move? Improvement here is the highest-value signal that your strategy is working.
- Return reasons tagged to image expectations: "Color different from photos" maps directly to flat lay or hero calibration failures. "Fit not as expected" maps to on-model or scale shot deficiencies.
- Return rate by colorway for the same SKU: If returns cluster on a specific color variant, inspect whether that colorway's images have lighting or color calibration differences from the hero color.
Production Efficiency Metrics
- Cost per image, separated by shot type and AI versus human assist: This tells you where AI is delivering real efficiency and where the QC overhead is consuming the time saved.
- Days from shoot to PDP live: A realistic target for an established hybrid pipeline is two to five days for core catalog SKUs.
- QC pass rate on first review: Below 90 percent signals inconsistent inputs, weak shot list discipline, or AI outputs exceeding your generation quality threshold.
- AI output rejection rate by failure mode: Tracking this tells you whether to adjust LoRA training, generation prompts, or QC thresholds. Repeated rejections for the same artifact are a signal to fix the upstream model, not to add more downstream QC hours.
Turn Shot Planning Into A Brief That Travels Through The Org
A PDP image strategy that exists only in the creative director's memory or a presentation deck collapses the moment it reaches the studio floor. The strategy must be embedded in shot lists, retouching briefs, and QC gates that travel through the organization without interpretation.
Shot Lists That Map To Conversion Jobs
A conversion-oriented shot list does not just name angles. It maps each angle to a conversion job and specifies what a passing image looks like.
Example for outerwear:
Every cell in this table is a decision that belongs in the creative director's domain, not left to the studio or retoucher to interpret.
Pixofix provides professional post-production and AI-assisted image production for high-volume fashion and ecommerce brands, with 200-plus retouchers across the US, EU, and Asia and experience across more than five million retouched images. For studios managing 500 to 10,000 SKUs per month, Pixofix operates with 24 to 48 hour delivery SLAs and structured QC loops for catalog-level consistency.


.png)
.png)