.png)

The Ultimate Guide to Product Photography for Ecommerce: How to Capture Images That Sell
Why Product Photography Matters for Ecommerce
Impact on Sales and Conversion Rates
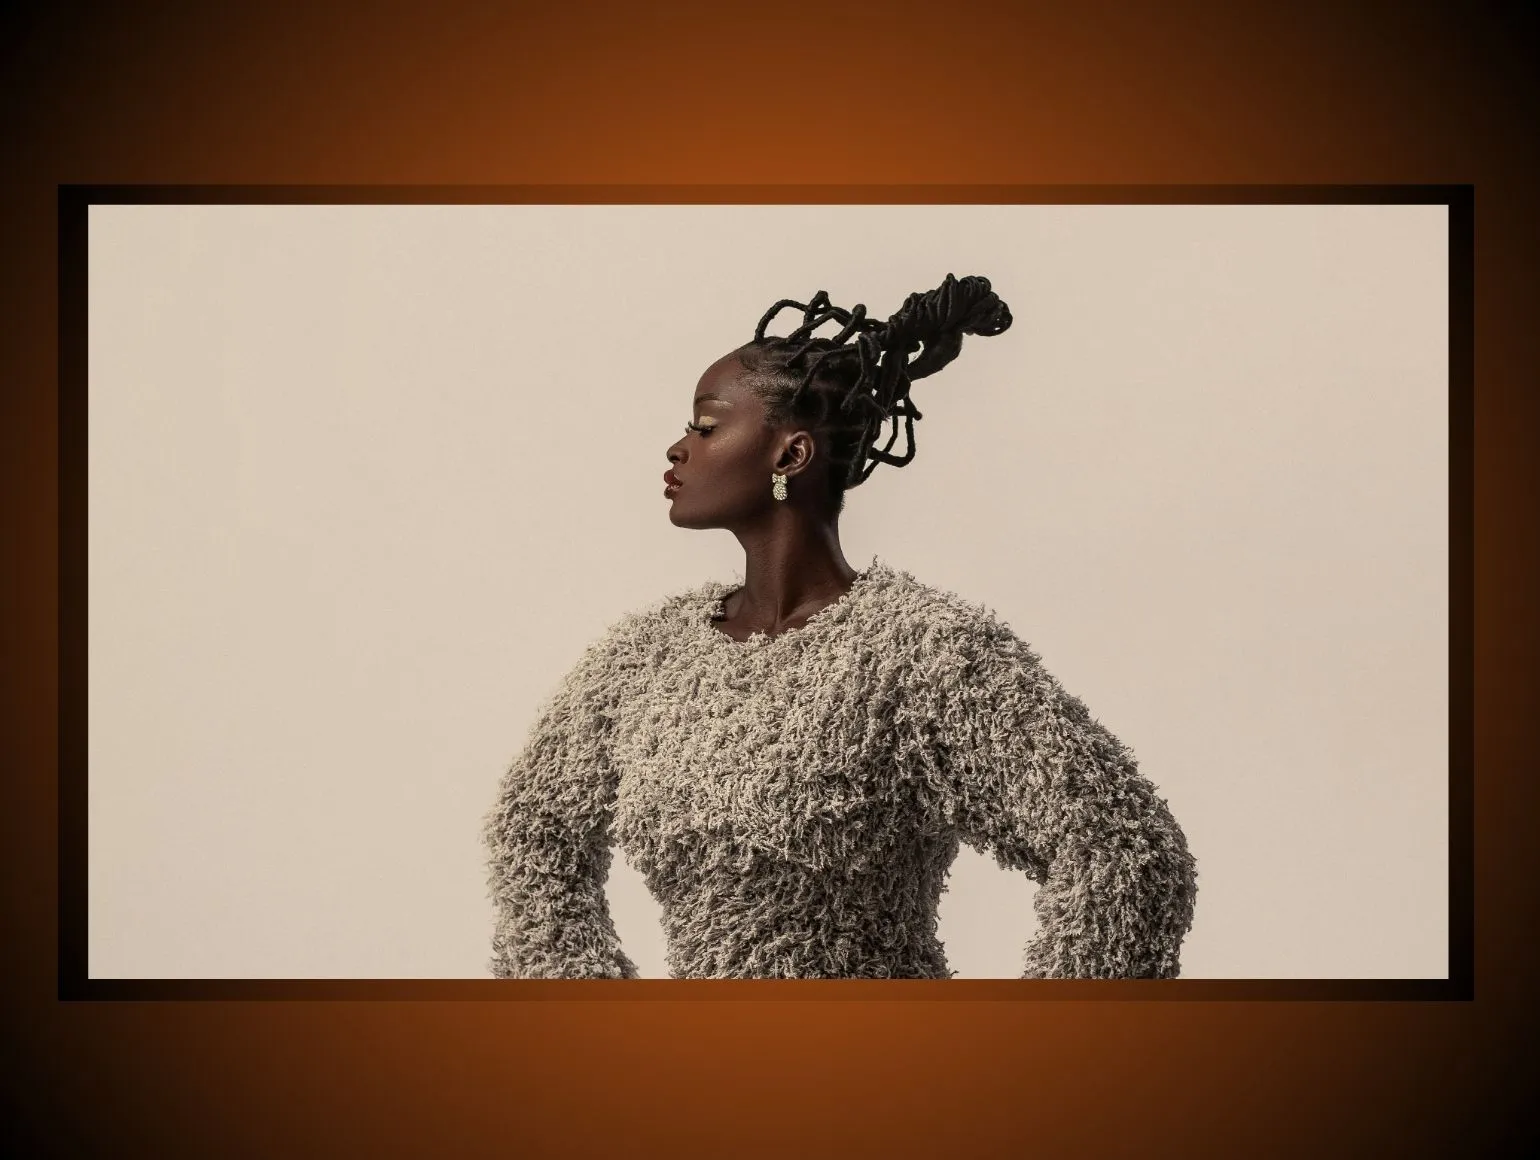
High-quality product photos aren’t just about looking good. They’re conversion tools. When shoppers can’t touch or try a product, the image does all the selling. Sharp, detailed photos answer questions before customers even ask. How does the fabric feel? What’s the texture, the finish, the function? Getting that visual clarity can mean the difference between bounce or buy.
Multiple angles, zoomed-in shots, and lifestyle scenes reduce friction. Suddenly, the product feels real. Conversion rates climb not because you added more features, but because you showed the existing ones better.
Building Brand Identity and Trust
Visuals speak first — faster than product titles, descriptions, or even reviews. Your photography is your handshake. A consistent, elevated image style tells shoppers your brand knows who it is. It says your product is premium. Or playful. Or sustainable. Whatever your story, the imagery carries it.
Trust isn’t built overnight. But inconsistent lighting, uneven colors, or clashing styles across your catalog can break it instantly. Clean, well-composed images build familiarity. Familiarity breeds confidence. Confidence drives sales.
Importance of Consistency Across Platforms
One product, many platforms — your site, Amazon, Instagram, email. Each has its own format. But your photography? That should always feel like you. Visual consistency across channels makes your brand recognizable, even in a sea of competition.
It also shortens the content production cycle. With the right setup and a predefined style, brands can rapidly repurpose assets. Partners like Pixofix slot into this workflow, ensuring that every photo is retouched to brand spec — fast, and without creative compromise.
Essential Equipment for Product Photography
Must-Have Cameras and Lenses
DSLRs and mirrorless cameras still dominate for ecommerce. Look for models that perform well in low light and deliver high dynamic range. Canon EOS R, Sony a7 series, Nikon Z cameras — all solid choices.
For lenses, go prime when possible. A 50mm or 85mm prime lens offers crispness with minimal distortion. For smaller products, a dedicated macro lens captures tight details without chromatic aberration.
Tripods and Stabilization Tools
A tripod does more than keep your camera steady. It locks consistency into your workflow. You’ll nail repeat angles, achieve sharper focus, and free up your hands for styling or lighting tweaks.
Ball-head tripods offer flexibility. C-stands and booms allow for overhead shots. For everyday ecommerce, a simple, height-adjustable tripod with a quick-release plate speeds up setups while maintaining frame control.
Lighting Solutions for Optimal Results
Lighting transforms how a product feels on screen. Natural light works if you're nimble and only shooting a few SKUs. For control and scalability, go artificial.
Use softboxes or LED panels to mimic daylight. Avoid harsh shadows. Products with shine? Use a light tent or diffused front lighting. This softens reflections and highlights key textures.
As your catalog grows, consistency becomes more critical than creativity. Lock in a three-point lighting setup, or invest in ring lights for even product lighting at scale.
Backgrounds and Props That Enhance Products
A clean white backdrop meets most platform requirements and keeps focus on the item. But depending on your brand, a hint of texture or shadow can elevate the final look.
Use sweep rolls, acrylic sheets, or fabric squares for flat lays. Props should support the product, not distract. For jewelry, think stone slabs or driftwood. For tech, minimal deskscapes. Every material and color you introduce should echo your brand tone.
Preparing for the Photoshoot
Setting Up Your Photography Space
You don’t need a full studio — just a controlled environment. Choose a space with minimal ambient light you can’t control. Keep walls neutral, and don’t mix color temps. Your shooting area should fit your largest products with elbow room for gear and lights.
Tape floor marks for tripod and subject positioning. Keep cables tucked. Clean the area, clean the lens, clean the product. Photography is precision work. Dust gives it away.
Creating a Shot List for Efficiency
Before you snap anything, build a shot list. This is your roadmap. It saves time mid-shoot, avoids reshoots, and keeps your visuals consistent across SKUs.
Your list might include: front shot, 45-degree angle, detail close-ups, scale reference, and lifestyle settings. Sequence it in shooting order. Shoot all front angles first, then rotate and repeat. Less camera repositioning equals faster workflows.
Mastering Lighting Techniques
Lighting isn't one-size-fits-all. The same setup that flatters a bottle may wreck a textured hoodie. Learn how light direction shapes perception. Side lighting enhances texture. Overhead lighting creates symmetry. Backlighting adds mood.
Don’t chase drama unless it serves the product. Ecommerce photography often favors even, accurate lighting over atmosphere. Keep color temperatures balanced — around 5500K mimics daylight and keeps colors true.
Using Reflectors and Diffusers
Reflectors bounce light back into shadows. Diffusers soften it before it hits the product’s surface. Both give you finesse.
White foam boards make great DIY reflectors. A sheer shower curtain works as a diffuser. Want sharper edges? Ditch the diffuser. Need to fade harsh cast shadows under a product? Slide in a bounce card to lift the shadows.
Learning how to shape light manually builds instincts — skills AI editing can’t replicate but can enhance later.
Executing the Photoshoot
Angles That Showcase Products
Flat front shots get the job done, but they rarely sell emotion. Play with angles that show function and form. A 45-degree shot gives depth. An overhead flat lay adds context.
For 3D products like bags or shoes, show the whole silhouette, then get close on the details — stitching, materials, closures. Give shoppers the angles they’d explore in-store.
Experimenting with Composition Styles
Grid layouts and centered compositions feel clean and structured. But asymmetry draws the eye. A little negative space, an off-center subject, a diagonal line — these guide attention without overwhelming the frame.
Mix these styles cautiously. If you shoot campaigns and catalog shots at once, align your crop ratios and visual tone. Otherwise, your site starts to look like a collage instead of a brand.
Macro vs. Lifestyle Shots
Macro shots capture material integrity — the grain of leather, the pop on a button, the glint on a gemstone. They assure buyers of quality. Lifestyle shots, meanwhile, tell stories. They show context, scale, and aspiration.
Use both. Macro earns trust. Lifestyle builds desire.
Keep in mind: post-production fixes can’t fake what macro reveals. If your product finish is less than flawless, prepare for extra edits. That’s where retouching partners like Pixofix come in — balancing realism with refined polish.
Incorporating Movement and Environment
GIFs, shadows, wind — products don’t sit still in real life. Adding subtle motion can bring flat objects to life. Show a jacket being zipped. A lid being lifted. A foot mid-step in a sneaker.
Use slow shutter or burst modes to experiment. Just make sure the movement serves the product, not just the aesthetic.
Recreate environments with lightweight props and lighting tweaks. For example, warm-toned light can simulate sunset. A soft backdrop and one prop can set an entire mood.
Post-Production Tips for Stunning Images
Basic Editing Workflows
Start with cleanup. Remove dust spots, balance exposure, correct white balance. Then refine. Adjust contrast, sharpen key textures, and ensure accurate colors. Crop to platform specs.
Set up batch processing for basic steps when possible. Keep edits subtle. Too-clean edits can feel sterile. Too-styled and you lose credibility.
High-volume brands often lean on retouchers like Pixofix to plug directly into their workflow — combining automation with brand-specific creative oversight.
Essential Software for Image Editing
Lightroom handles batch corrections and raw conversions efficiently. Photoshop gives precision for object removal, composite tweaks, and selective adjustments. Capture One is a favorite for color integrity, especially in fashion.
Generative AI tools are starting to help with cleanup and backdrops, but they don’t replace human taste. Use them to save time, not to replace craft.
Retouching Common Issues: Reflections and Dull Colors
Reflections can ruin mirror-finish products. Use clone stamps or healing tools to eliminate camera gear reflections. For glass or gloss surfaces, retouch to reduce glare — not erase it fully. A bit of shine tells the truth.
Dull colors often come from poor lighting or camera settings. Fix with selective hue/saturation tools or use Capture One’s color editor. Always reference the real product. Don’t oversaturate to make it “pop.”
Pixofix deals with these exact issues daily. Their workflows combine manual finesse with AI tooling, ensuring the final image is vibrant but honest.
Before-and-After Comparisons
Never underestimate the power of showing the original next to the retouched image. It highlights the value of editing — the dust removed, the colors corrected, the distractions cleaned. More importantly, it holds your visual standards accountable.
These comparisons are also useful training tools. Share them with your team or with external partners like Pixofix to align on what quality looks like for your brand. Over time, the goal is simple: make the “after” look so natural, no one notices it’s been edited at all.## Maximizing Product Image Usage
Creating Visual Content for Marketing
Don’t shoot just for product pages. Every photo is a chance to feed your marketing machine. That 45-degree angle? Perfect for a Facebook ad. A tight macro crop? Use it on Instagram Stories. Lifestyle shots? Ideal for email headers or homepage banners.
Design with reuse in mind. Leave negative space in key shots for copy overlays. Create alternate crops for each platform’s aspect ratio. When photos multitask, you speed up content creation and keep your brand visuals aligned across channels.
Shoot once. Use everywhere.
Optimizing Images for Web Performance
No one waits for a slow site — especially on mobile. Your images can’t just look good, they have to load fast.
Compress files without ruining quality. Tools like TinyPNG or WebP conversion strike the balance. Stick to the right formats: JPEGs for photos, PNGs only when you need transparency.
Keep dimensions tailored to placement. A 4000px-wide hero image might shine on desktop, but it’s wasted bandwidth on a thumbnail. Set export presets based on usage — hero, category tile, zoom detail — and automate where you can.
Consistent Branding and Aesthetics
Every photo speaks. The question is whether it’s speaking your brand’s language.
Lock in a defined visual style — your color tones, lighting mood, shadow depth, crops, and props. Then apply it like a visual signature. Whether it’s a rustic linen background or high-key whites, this consistency is what makes your product instantly recognizable across ads, marketplaces, and organic feeds.
It’s not about uniformity. It’s about identity.
Partners like Pixofix help enforce that standard across high-volume shoots, acting less like editors and more like an extension of your creative team.
Key Metrics to Measure Success
Understanding Engagement Rates
Are people stopping to look? Engagement metrics tell you.
Track save rates on Instagram, click-throughs from pins, hover time on product thumbnails. If your biggest visual assets aren’t grabbing attention, it’s not just about the photos — it’s messaging, layout, or audience alignment. But great photos are the attention anchors.
When a lifestyle photo gets twice the scroll stop rate, that’s data worth scaling. Use it to reverse-engineer your next shoot.
Tracking Conversion Metrics
The true test of photography isn’t likes. It’s sales.
Measure the performance of image-led A/B tests. Version A: white background only. Version B: includes a lifestyle thumbnail. Which converts higher? Track not just the page load, but how far down funnel users go after interacting with an image.
Look at cart additions, bounce rate after zooms, and purchase rates by image type. This is where meaningful retouching pays off too — the better-quality image routinely outperforms a rushed one.
Monitoring Customer Feedback
Sometimes, the best insight doesn’t come from a metric — it comes from the comment section.
Watch for reviews that reference photos. “It looked lighter online,” or “The color was spot-on.” These notes are gold. They show where your imagery is setting the right (or wrong) expectations.
Also monitor returns. High returns based on product appearance often signal a mismatch between photo and physical item. Visual integrity matters more than snappy styling. Pixofix is keyed into this need — they aim for photos that are both beautiful and accurate to reduce post-purchase friction.
Common Mistakes to Avoid
Neglecting Lighting and Shadows
Light makes or breaks believability. Poor lighting flattens dimension, washes out textures, or casts distracting shadows. And once it's captured, no amount of editing can fully fix it.
Harsh shadows on one SKU and soft shadows on another? That screams inconsistency. Overexposed highlight on a metallic product? You’ve lost detail that realism depends on.
Always test your lighting setup before batch shooting. Walk around your set. Look at shadows, surface texture, and tonal balance from the actual customer’s POV.
Skipping the Editing Process
Raw images almost never make great product photos on their own. Even the best lit, perfectly styled photo needs basic retouching to align with brand quality.
Skipping post-production means leaving distractions in the frame — lint, uneven tones, color mismatches. Worse, it puts the burden on your customer to imagine what the product “should” look like.
Editing isn’t about faking it, it’s about focusing it. And with partners like Pixofix, fast and brand-aligned edits don’t have to stall your content calendar.
Inconsistent Image Quality
Some shots are sharp. Others soft. One background is cool white, another warm beige. Suddenly your store feels more like a marketplace than a brand.
Inconsistency kills trust.
The fix isn't more equipment. It's better process. Adopt presets for editing. Define shot lists with lens and camera settings. Create visual benchmarks per category.
Or better yet, integrate retouching squads like Pixofix that specialize in maintaining visual parity across entire product catalogs — fast, scalable, no guesswork.
Optimization Tips for Better Results
Techniques for Faster Editing
Speed doesn’t mean sacrificing polish. It means smarter tools and tighter steps.
Build Lightroom presets that match your brand tone — exposure, contrast, temp, curve. Use adjustment brushes for quick refinements. Stack batch edits with auto-synchronization to fly through similar SKUs.
AI-powered selections in Photoshop and background removal tools can save hours. But only if your base image is clean. Garbage in, garbage out.
Pixofix blends these tools into scalable workflows for ecommerce brands. AI helps with speed, human touch refines the results.
Maintaining Consistency Across a Product Line
Uniformity across a single SKU is easy. Across a 300-product line? That’s the challenge.
Create master templates. Not just for cropping, but for lighting setup, backdrop cues, and retouching thresholds. Then measure against those standards every shoot.
Don’t rely on each photographer’s “eye.” Lock in a creative direction into documentation. Better yet, share approved references with every production or retouching team you work with.
A photo should never feel like the odd one out in your grid.
Leveraging User-Generated Content
Your customers are your most powerful visual storytellers — if you guide them.
Encourage UGC with a visual prompt: “Tag us showing how you style/use/display the product.” Then curate ruthlessly. Look for tonal alignment, clarity, and emotion.
A real-skin photo of someone wearing your boots outdoors? That sells lifestyle better than a polished studio shot ever could.
Pixofix also helps brands repurpose UGC into on-brand assets — balancing authenticity with light cleanup to bring unpolished moments into your polished ecosystem.
Developing a Product Photography Strategy
Aligning Photography with Marketing Goals
Your product photos aren’t just assets. They’re built to serve a purpose — drive clicks, reduce returns, show off materials, spark desire.
So start at the end. Are you launching a premium line? Plan for high-end lifestyle images. Pushing quick conversions on ads? Go for clean-on-white with eye-popping macro detail.
Every shoot should ladder up to a campaign goal. Budget and briefs should match. Your best-performing products deserve your best photography — not whatever’s left over after the shoot's done.
Collaborating with Creative Teams
Photography doesn’t live in a silo. It touches brand, growth, design, even CX.
Loop in stakeholders early. Your merchandiser cares about fabric tone. Your designer needs clean crops for mobile tiles. Your ad team wants contrast and clarity for paid.
Use shared mood boards, template guides, and real-time feedback loops. And when working with external partners like Pixofix, treat them like teammates. Share your brand story and goals so they can make aligned decisions mid-edit.
Continuously Updating Your Approach
What works this season might feel stale next quarter. Keep refining.
Review performance data. Watch emerging visual trends in your category. Study how customers are photographing your product themselves.
Small tweaks add up — from how you shoot textures to how tightly you crop.
Don’t treat your photography playbook as final. Treat it as evolving. And partner with creatives and studios, like Pixofix, that can flex with you — updating workflows and retouching styles as your brand voice evolves.


.png)
.png)