.png)

Womenswear PDP Images: Retouching That Drives Conversions
Womenswear PDP Images: What Converts And How To Retouch For Maximum Impact
Most womenswear PDP tests that genuinely move conversion do not come from new layouts or oversized CTAs. They come from precise, disciplined changes in how fabric, color, and fit read at thumbnail and zoom.
If you run 500 to 10,000 plus SKUs per month, you already understand the constraint. Your studio can produce beautiful one-off art direction. The real challenge is repeating the same standard across 8 colorways, 5 size runs, and thousands of garments without color drift, fit distortion, or lighting shifts that erode shopper trust and damage SLA adherence.
At current volumes and expectations, AI generation combined with human quality control is no longer a novelty. It is a production strategy.
Womenswear PDP Images That Convert
Conversion on womenswear PDPs is mostly a confidence problem. The customer must trust what they see enough to commit to size, color, and fabric feel without touching the garment.
Teams that win treat PDP imagery as a structured information system, not an aesthetic exercise. They define a repeatable image stack, then enforce retouching rules that keep every frame true to product and consistent with the brand’s fit promise.
Lead With Fit, Clarity, And Confidence
The hero image must answer one question fast. Does this garment fit my body type in the way I want.
For fitted dresses, tailored blazers, and denim, prioritize a clean, frontal on-model shot that clearly shows waist position, shoulder line, bust, and hip. Avoid poses that twist the torso so much that the customer cannot read real proportions.
Keep lighting flat enough to avoid heavy shadowing that hides seam lines or darts. Resist the temptation to flatten everything. Minimal controlled contrast can clarify volume at the hip or sleeve, where fit anxiety often spikes.
For looser categories like oversized knits or wide-leg trousers, the key is to show where the garment touches the body. Hem break on shoes, sleeve length on wrist, neck opening against collarbone. Any retouch that removes these cues to “clean up” the image will hurt conversion and increase size related returns.
Use The Right Image Mix
High converting womenswear PDPs tend to follow a predictable image mix. One clear hero. Two to four supporting angles. Two to six detail shots, depending on price point and fabrication.
At mass to premium mass tiers, 6 to 8 stills is often enough if each image is doing real work. At contemporary and above, 8 to 12 images plus motion is standard, especially for technical fabrics, tailoring, and occasionwear.
The core set for most categories:
- Hero front on-model
- Secondary angle or 45 degree
- Back view on-model
- Side view that shows profile and drape
- Fabric and construction details
- Styling or lifestyle context if relevant
Your retouching guidelines should map directly to this mix. Hero frames prioritize clean but realistic skin and accurate garment shape. Detail frames prioritize sharpness, disciplined texture mapping, and precise color control.
Show Angles Shoppers Expect
Expectation is set by the biggest vertical players. If your PDP deviates, shoppers assume you are hiding something.
Essential angles for womenswear:
- True front
- True back
- True side, not a vague three-quarter
- Seated or movement shot for skirts and dresses where ride up is a concern
- Close-up of closures, waistbands, and necklines that often decide fit
AI tools can hallucinate flattering but misleading angles. Guardrails are essential. On ghost mannequin frames, keep shoulder width, neck drop, and leg opening shape consistent with technical specs. Heavy handed correction may look tidy in isolation but will misalign with sizing charts and push up returns.
What Shoppers Need To See
By the time a user reaches your womenswear PDP images, they are validating purchase risk, not browsing randomly. Your content must close that gap faster than any size chart or fit guide.
Front, Back, And Side Views
You can add all the stylized content you like. If the triad of front, back, and side views is missing or weak, conversion takes a hit.
Front view must show:
- Shoulder seam placement
- Neckline depth and width
- Bust and waist contour
- Hem length against leg
Back view must show:
- Yoke and seam positions
- Back rise on denim and trousers
- Closure types and placements
- Any volume or pleating detail
Side view should clarify:
- Bust projection and dart shaping
- Bum coverage on skirts, dresses, and outerwear
- Sleeve pitch and elbow volume
- Pant leg fall from thigh to hem
Retouching here is about micro corrections, not redesign. Fix wrinkling that is clearly transit or pinning related. Do not erase real pull lines that communicate fit tension, especially at waist, bust, and seat.
Close-Ups For Fabric And Finish
Detail frames often decide higher AOV purchases. Shoppers zoom into:
- Knit structure on sweaters
- Weave on tailoring
- Print registration on patterns
- Needlework on seams and hems
- Hardware, closures, and labels
Technically, this is where your pipeline must avoid plasticizing. Many AI or heavy handed Photoshop workflows blur micro texture to kill noise. On high DPI monitors and mobile pinch zoom, this reads as cheap or synthetic.
Use localized sharpening and careful texture mapping to emphasize true grain, slub, or knit while keeping noise reduction restrained. In Capture One or Photoshop, use masking on fabric panels instead of global clarity or texture sliders that hit skin and background equally.
Context Shots That Support Styling
Context images should not replace core angles. They are additive.
Useful approaches:
- Full body styled looks for dresses and tailoring
- Layering examples for knits and outerwear
- Shoe pairings for trousers and skirts
Generative tools can build convincing lifestyle backplates or virtual environments. The main failure mode is inconsistency. Different prompts, seeds, or LoRA training weights across batches produce subtle shifts in horizon line, color temperature, and grain that fragment brand identity and slow QC loops.
If you use generative backgrounds, standardize prompt templates, LUTs, and grain overlays. Then run strict human QC on horizon straightness, perspective alignment with model pose, and cohesion with your wider art direction.
Motion And Video For Drape
Static womenswear PDP images cannot fully explain drape, especially for:
- Bias cut dresses and skirts
- Chiffon, georgette, and other fluid wovens
- Wide leg and barrel leg pants
- Voluminous sleeves and tiered skirts
Short clips or generative video sequences can communicate movement and recovery. The trap is artifacting around hems, hands, and hair, which can feel cheap or uncanny.
Use motion to emphasize:
- Fabric weight and swing
- Sheerness in backlight
- Recovery after stretching or walking
- How the garment behaves when sitting or climbing steps
Retouching on motion is closer to grading than still work. Keep skin realistic, avoid temporal flicker in color, and maintain consistent framing and crop across cuts so the experience feels controlled.
Womenswear PDP Images Need Color Accuracy
Color on PDPs is a contract. If on-screen color does not match the garment that arrives, you pay twice in returns and brand damage.
Womenswear is especially sensitive because color signals style and occasion. A “cool beige” trench that skews yellow in one batch and pink in another trains customers not to trust your womenswear PDP images.
Match White Balance Across Batches
White balance drift across a drop is a common post-production bottleneck. You see it when:
- Early images in a batch are neutral
- Later ones pick up a green or magenta cast
- Studio day shifts from morning cool to afternoon warm
- Different photographers shoot with slightly different settings
Fix this by standardizing on calibrated Capture One sessions with locked profiles, then running batch level white balance corrections anchored to a physical gray card or color checker in each lighting setup.
AI tools that auto correct per image, including some Imagen 3 and Stable Diffusion based pipelines, tend to normalize each frame individually. That can work for 1 to 10 images. At 500 SKUs plus, you end up with subtle but consistent drift that is obvious in category grids or colorway switchers.
Protect Fabric Tone And Depth
Not all neutrals are equal. Warm ecru, cool stone, and greige must read distinctly. Over simplified AI retouching often collapses this nuance and flattens tonal differences.
Technical practices to maintain depth:
- Work in 16 bit where possible to avoid banding in subtle gradients
- Use curves and selective color, not only saturation and vibrance
- Apply local contrast adjustments selectively to textured panels
- Avoid global dodge and burn that kills midtone complexity
For darks, especially black tailoring and eveningwear, lift shadows just enough to reveal seam structure and lapels without turning the garment charcoal. Check histograms across batches to ensure blacks and whites hit consistent target values.
Standardize Color Across Colorways
Color consistency must hold within a style across all its colorways. Shoppers often decide between “forest” and “black” based on subtle differences in how the same fabric reads.
To achieve this:
- Build a per style color reference board using your master shots
- Define target HSL ranges for core brand colors
- Use clipping paths to isolate garment from background for precise adjustments
- Apply the same color profiles or LUTs across all colorways
AI pipelines often interpret each colorway separately. If you are using virtual models or AI Model Shots that infer fabric from flat-lay, enforce a post-production pass that aligns color rendering back to your physical sample. For brands that care about repeat purchase behavior, this discipline is non negotiable.
How To Retouch Womenswear PDP Images
Retouching womenswear PDP images is a balancing act. Clean, aspirational, and consistent, yet still grounded in product truth. When you cross the line, conversion may look fine until returns and reviews catch up.
Clean Distracting Imperfections
Start by removing distractions that are not inherent to the product:
- Lint, dust, stray threads
- Temporary creases from packing
- Background scuffs and studio artifacts
- Uneven pins or clips visible in frame
Use non destructive workflows in Photoshop, especially for high volume. Actions and scripts help, but avoid fully automated dust removal on detailed fabrics. Tools that indiscriminately blur specks can destroy lace edges, nubby tweeds, or open knits.
QC loops should explicitly flag jewelry reflections and metal hardware on garments. AI tools often mis handle specular highlights, duplicating or warping reflections near hair and hands. Human retouchers need to normalize these so zippers, buttons, and buckles look expensive, not plastic.
Preserve Texture And Natural Shape
Texture is where many AI workflows fall short. Diffusion based generations, particularly from Midjourney or generic Stable Diffusion models, are tuned for pleasing global aesthetics rather than faithful micro detail.
In retouch:
- Preserve the character of each fabric, from fuzz on brushed wool to sheen variation on satin
- Use frequency separation sparingly on garments, and test results at 100 percent zoom
- Always compare against a calibrated sample shot or a reference board
Shape is equally important. Shoulder lines on blazers, armholes on tanks, and side seams on dresses should remain true to pattern. Ghost mannequin processing often introduces shoulder distortions or unnatural neck shapes. Correct them only to match realistic on-body form, not to chase an abstract ideal.
Refine Garment Fit Without Warping
Minor fit corrections are acceptable when samples differ from production intent or when on set pinning creates misleading bulges.
Acceptable:
- Smoothing micro bulges from tape or temporary pins
- Correcting slightly crooked hems
- Relaxing harsh pull lines that came from model movement, not garment cut
Not acceptable:
- Narrowing waists beyond what grading supports
- Lifting bustlines so high they mislead support expectations
- Thinning arms or legs to meet arbitrary beauty standards
- Collapsing ease from relaxed fits to fake bodycon silhouettes
Use warp tools with strict reference to your size spec. For virtual models, ensure your LoRA training is done on your own garments or very close analogs. Generic female body LoRAs tend to flatten variance in body type and can misrepresent fit on real customers.
Correct Samples And Hardware Issues
Womenswear samples often arrive pre production. Buttons are misaligned, zips are temporary, prints are not fully tuned.
You can correct:
- Button spacing when production will be accurate
- Loose threads around buttonholes and hems
- Slightly misregistered prints that will be corrected in bulk
You must not:
- Change button count
- Move closures in ways that affect perceived fit security
- Recolor hardware from nickel to gold if that is not the shipped version
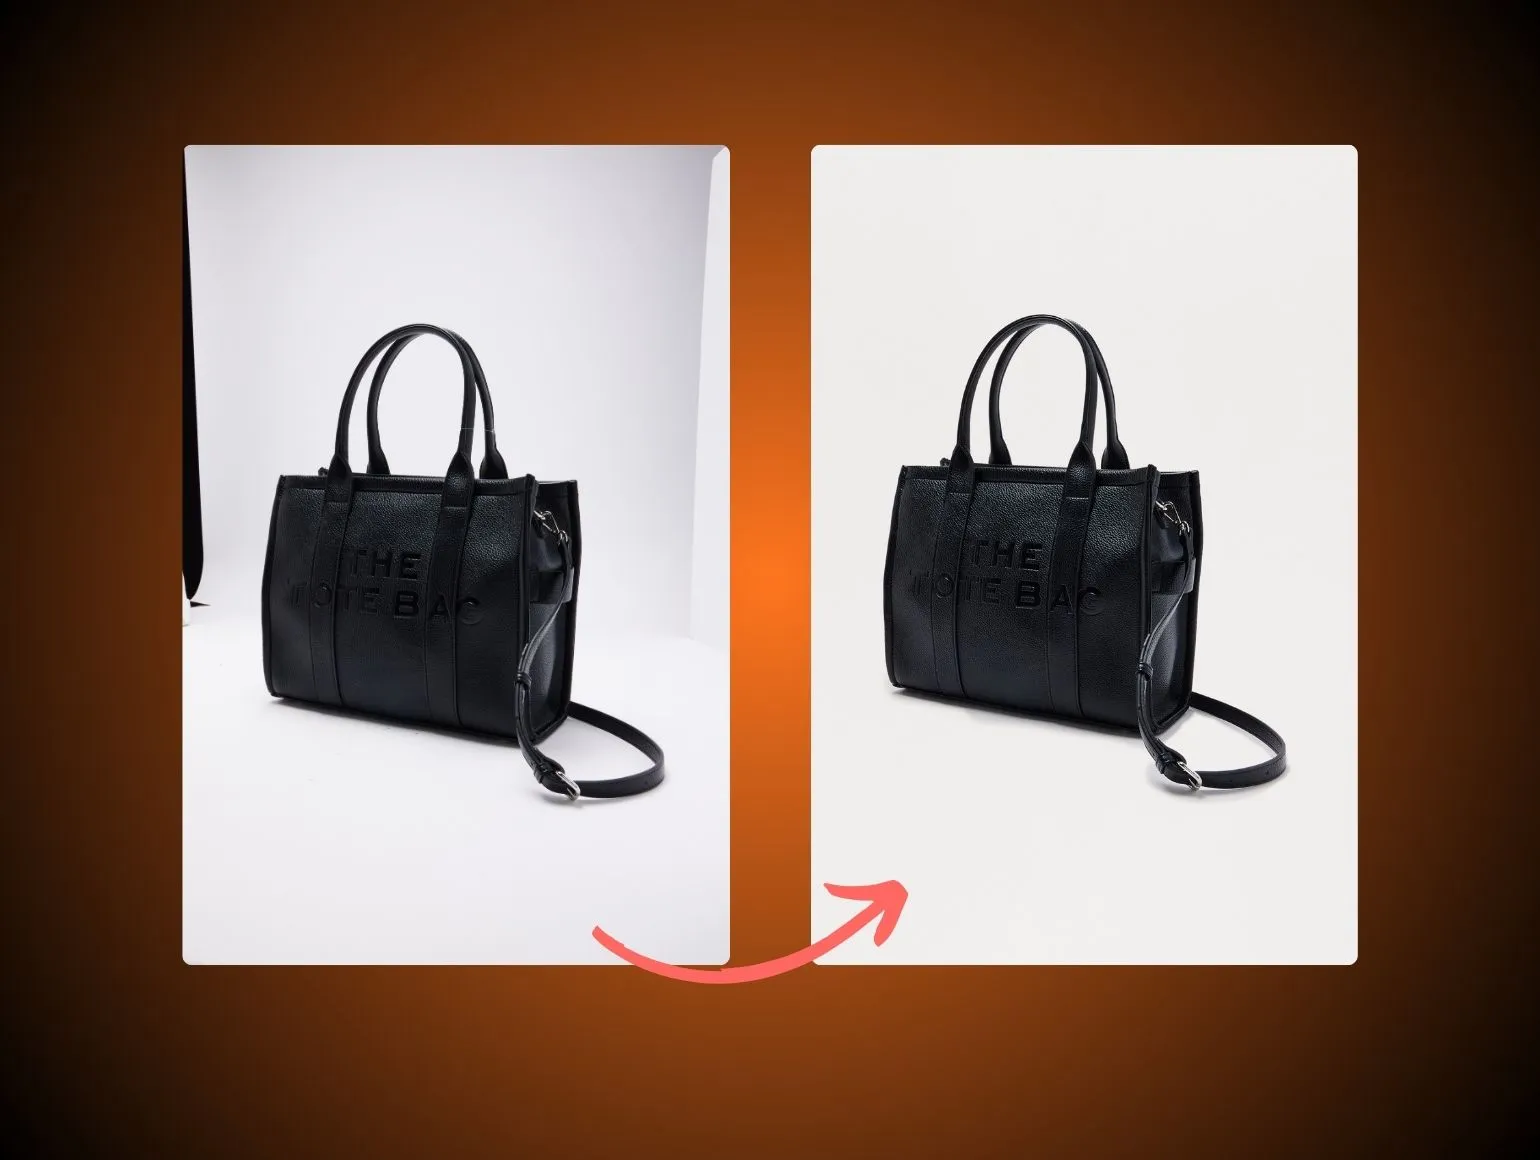
Hardware like zippers and clasps often exhibits specular highlights that AI clean up tools damage. Humans need to refine edge clarity, control highlight roll off, and ensure that metal looks like metal. This is especially important for handbags, belts, and dresses with visible hardware in the shot.
Build A Hybrid AI Plus Human Workflow
Pure AI pipelines can look impressive in demos. At production scale, they often create as many new problems as they solve.
The practical answer is hybrid. Use AI to generate or pre process at speed. Then rely on trained retouchers to enforce consistency and product truth.
Use AI For Speed And Variations
Current AI tools are strong at:
- Generating virtual models in different demographics
- Simulating alternative backgrounds
- Creating new crops and aspect ratios
- Scaling ghost mannequin outputs from flat-lay
Systems like Flux Pro, Imagen 3, and tuned Stable Diffusion variants can quickly produce on-model views from flat-lay inputs. For womenswear, this is powerful for long tail SKUs where on-model shoots are expensive, or when you must fill PDP gaps fast.
Set up controlled LoRA training on your brand’s silhouettes, fits, and textures. Align on a base set of prompts and negative prompts to reduce hallucinations around hands, fingers, and jewelry.
Use Retouchers For QC And Consistency
Human retouchers are not a “fix it later” step. They are the quality gate between rapid AI outputs and live womenswear PDP images.
Key responsibilities:
- Enforce studio guidelines on crop, angle, and framing
- Correct AI artifacts in hands, hair, and garment edges
- Normalize color against calibrated references and colorways
- Maintain consistent shadow depth and direction
Pixofix, with 200 plus retouchers across the US, EU, and Asia and over 5M images retouched, uses this QC role to keep 24 to 48 hour delivery SLAs realistic for standard catalog batches. That human layer converts volatile AI results into predictable ecommerce output.
Route Exceptions To Human Review
Not all images need identical attention. Build routing rules so human effort lands where risk is highest.
Examples:
- High risk categories like whites, sheers, and activewear go through enhanced QC
- SKUs flagged by AI anomaly detection, such as warped fingers or broken patterns, are auto routed to senior retouchers
- New season colorways trigger color specialist review on first pass
Use production dashboards to track version history, comments, and approvals. Tie QC exceptions to SLA adherence metrics so you understand where human review is adding value versus where your AI stack needs retraining or tighter guardrails.
Womenswear PDP Images At Catalog Scale
Most AI vendors demo on a handful of SKUs. Your reality is different. You must maintain the same look and feel across thousands of garments, shot by multiple photographers, often in multiple locations or on different rigs.
This is where pure AI pipelines usually fail. They treat each frame as a fresh canvas instead of as a node in a tightly controlled system.
Handle 500 To 10,000 Plus SKUs
Once you cross 500 SKUs per drop, minor inconsistencies compound into real problems:
- Mixed lighting temperatures within a single category page
- Varying crop heights that make models appear different sizes
- Slightly different virtual models used for the same category
AI tools behave well when you sit beside them tuning outputs for 1 to 10 images. At 500 to 10,000 SKUs, small variations in prompt text, input quality, or model updates create lighting drift, inconsistent color, and subtle garment distortions that stand out in grid view. The operational answer is a system where AI handles first pass creation, then human QC enforces catalog level consistency.
Pixofix uses AI Model Shots to generate highly realistic on-model womenswear PDP images from flat-lay inputs only, then routes those outputs through human QC backed by its 5M plus image history. The focus is not novelty, it is repeatable production.
Keep Lighting And Crop Consistent
Consistency in lighting and crop is what makes your PDPs feel premium. Inconsistency signals a mixed marketplace, even when you own the product.
Operational steps:
- Lock crop ratios and model height anchoring in your templates
- Standardize horizon line and vertical alignment for standing poses
- Maintain a fixed key to fill ratio per lighting setup
AI outputs should be normalized against this standard. Use batch comparison views in your QC tool to catch drift early. Pay particular attention to directional shadows on floor and under hems. Generative backplates often introduce conflicting shadow directions or inconsistent softness that break believability.
Meet 24 To 48 Hour SLAs
Speed to site is a margin driver. Delays in post impact merchandising, performance marketing, and inventory risk.
To hit 24 to 48 hour SLAs from shoot or asset ingest to PDP ready:
- Pre define retouching presets per category and fabric
- Standardize naming conventions and metadata tags for auto routing
- Use AI to pre classify images by angle and purpose
Pixofix, serving brands with 500 to 10,000 plus SKUs per month, combines automation with human routing to keep throughput high and rework low. At this scale, SLAs depend on minimizing revision loops through predictable, consistent quality.
Common Retouching Mistakes To Avoid
This is where many teams quietly lose money. The mistakes are small, but they compound at scale.
Format: Mistake → Consequence → Fix.
Over-Smoothing Skin And Fabric
Mistake: Aggressively smoothing skin and fabric to hide every pore and wrinkle.
Consequence: Artificial skin under studio lighting destroys realism, and over smoothed fabrics look synthetic. Customers begin to distrust both fit and fabric quality, which increases returns and triggers negative reviews about “cheap” feel.
Fix: Limit skin retouching to temporary blemishes and minor tone balancing. Preserve natural skin texture. For garments, retain grain, knit definition, and crease structure that reflects real wear. Use frequency separation sparingly and always reference untouched samples during QC.
Distorting Garment Shape
Mistake: Using warp and liquify tools to “improve” silhouette by narrowing waists, lifting hips, or thinning sleeves.
Consequence: PDP images misrepresent fit and grading, leading to poor size selection and higher return rates. Over time, customers notice the disconnect between images and try on experience.
Fix: Define non negotiable shape rules aligned with technical design. Limit corrections to sample inaccuracies and on set pinning artifacts. Train retouchers on pattern lines so they understand where they can intervene without changing fit perception.
Letting Color Drift Between SKUs
Mistake: Allowing individual retouchers or AI tools to grade images independently, with no batch level color anchor.
Consequence: Color drift across styles and colorways damages trust and makes category pages feel chaotic. Customers cannot reliably compare “navy” from one product to another.
Fix: Create calibrated color references per key color and fabric. Use batch grading in Capture One or similar, then apply uniform corrections. Enforce a final QC pass that compares products side by side in grid view, not only as individual frames.
Publishing Inconsistent Shadows
Mistake: Mixing floating products with heavy ground shadows, or inconsistent shadow direction between images.
Consequence: PDP and PLP grids feel stitched together from different sources. Shoppers perceive the site as less curated and lower quality, which erodes perceived value and price elasticity.
Fix: Standardize shadow style per content type, for example soft drop shadow for ghost mannequin and light floor shadow for on-model studio. Bake these into retouching templates and use clipping paths to control edge blending. Run QC at category level to verify shadow direction and intensity.
A Practical Retouching Checklist
Checklists reduce rework. They also make it easier to scale quality across internal teams and external partners.
Confirm Product Truth Against Sample
Before sign off, compare final images against:
- Physical sample under calibrated light
- Tech pack references
- Up to date production notes on any late changes
Verify key details:
- Stitch types that are visually significant
- Print scale and orientation
- Hardware finishes and placements
- True garment length relative to body
Any mismatch here becomes expensive once multiplied across thousands of units.
Check Consistency Across Variant Sets
Variants must feel like a single story:
- Colorways
- Length variants, such as petite and tall
- Fabric swaps within the same silhouette
Confirm that:
- Crop and camera height are identical across variants
- Model pose is similar enough to compare fit
- Color rendering is consistent with defined targets
- Shadows and background tone are stable
Automate variant grouping in your DAM or production tool so QC sees related SKUs together, not as isolated tickets.
Validate Mobile And Zoom Readability
Most shoppers browse on mobile, but complex garments are often purchased after desktop zoom inspection.
Test across both:
- Can you read fabric type at normal mobile viewport without pinch zoom
- Does zoom reveal texture rather than artifacts or noise
- Are critical details such as closures, pockets, and care tags legible
Avoid overly tight crops that look fine on desktop but feel cramped on mobile. For long garments, ensure at least one frame shows full body head to toe so customers can judge proportion.
Export For PDP And Secondary Channels
Your womenswear PDP images rarely live only on the PDP. They appear in:
- Category and search grids
- Email and CRM
- Paid social and PLAs
- Marketplaces with different spec requirements
Build export presets aligned with each channel’s constraints. Maintain a primary master format for PDP that prioritizes color and detail, then create derivatives that adjust aspect ratio, compression, and sharpness without changing perceived color or contrast. Use lossless masters as the source to avoid generational degradation.
Metrics That Prove Impact
If you cannot tie retouching and production decisions back to metrics, they will always look like cost centers. The following KPIs help quantify the impact of better womenswear PDP imagery.
Track Conversion And Add To Cart
Monitor:
- Product detail page conversion rate
- Add to cart rate
- Size selection distribution
Compare these metrics before and after major changes to your image stack or retouching standards. Pay attention to categories where better clarity on fit, such as denim or fitted dresses, leads to fewer size switches in the first 24 hours after launch. Use holdouts where possible so you can separate visual improvements from pricing or promo changes.
Watch Return Rate By Colorway
Return rate is often the most direct feedback loop for womenswear PDP images.
Break down by:
- Colorway within a style
- Fabric group
- Category
High return rates clustered in specific colorways usually indicate color inaccuracy, sheerness not communicated, or misrepresented texture. Use this to calibrate retouching intensity and detail shot selection. Pair return comments with QC findings to refine your image guidelines.
Measure Zooms, Dwell Time, And Scroll Depth
Behavioral signals can reveal gaps in your imagery before returns do.
Key signals:
- Zoom rate on images
- Average time spent interacting with the image carousel
- Scroll depth on PDP media modules
Very high zoom rates concentrated on specific frames, such as close ups of waistbands or bust areas, may indicate unresolved questions in your primary angles. Very low interaction may signal either perfect clarity or total disengagement, so segment by conversion outcome to interpret correctly. Use these insights to prioritize which angles and detail shots to optimize first.


.png)
.png)